.png?width=185&height=50&name=Full%20Passion.io%20logo%20(white).png)
IN THIS ARTICLE
1. How to set up discount codes for ClickFunnels checkout
2. Connect the ClickFunnels checkout page to your Passion.io account
3. Frequently Asked Questions (FAQs)
If you haven’t set up your Zapier integration yet, please click HERE.
1. How to set up discount codes for ClickFunnels checkout
1. Set up two pricing plans on your Passion.io account (App Builder): full price and discounted.
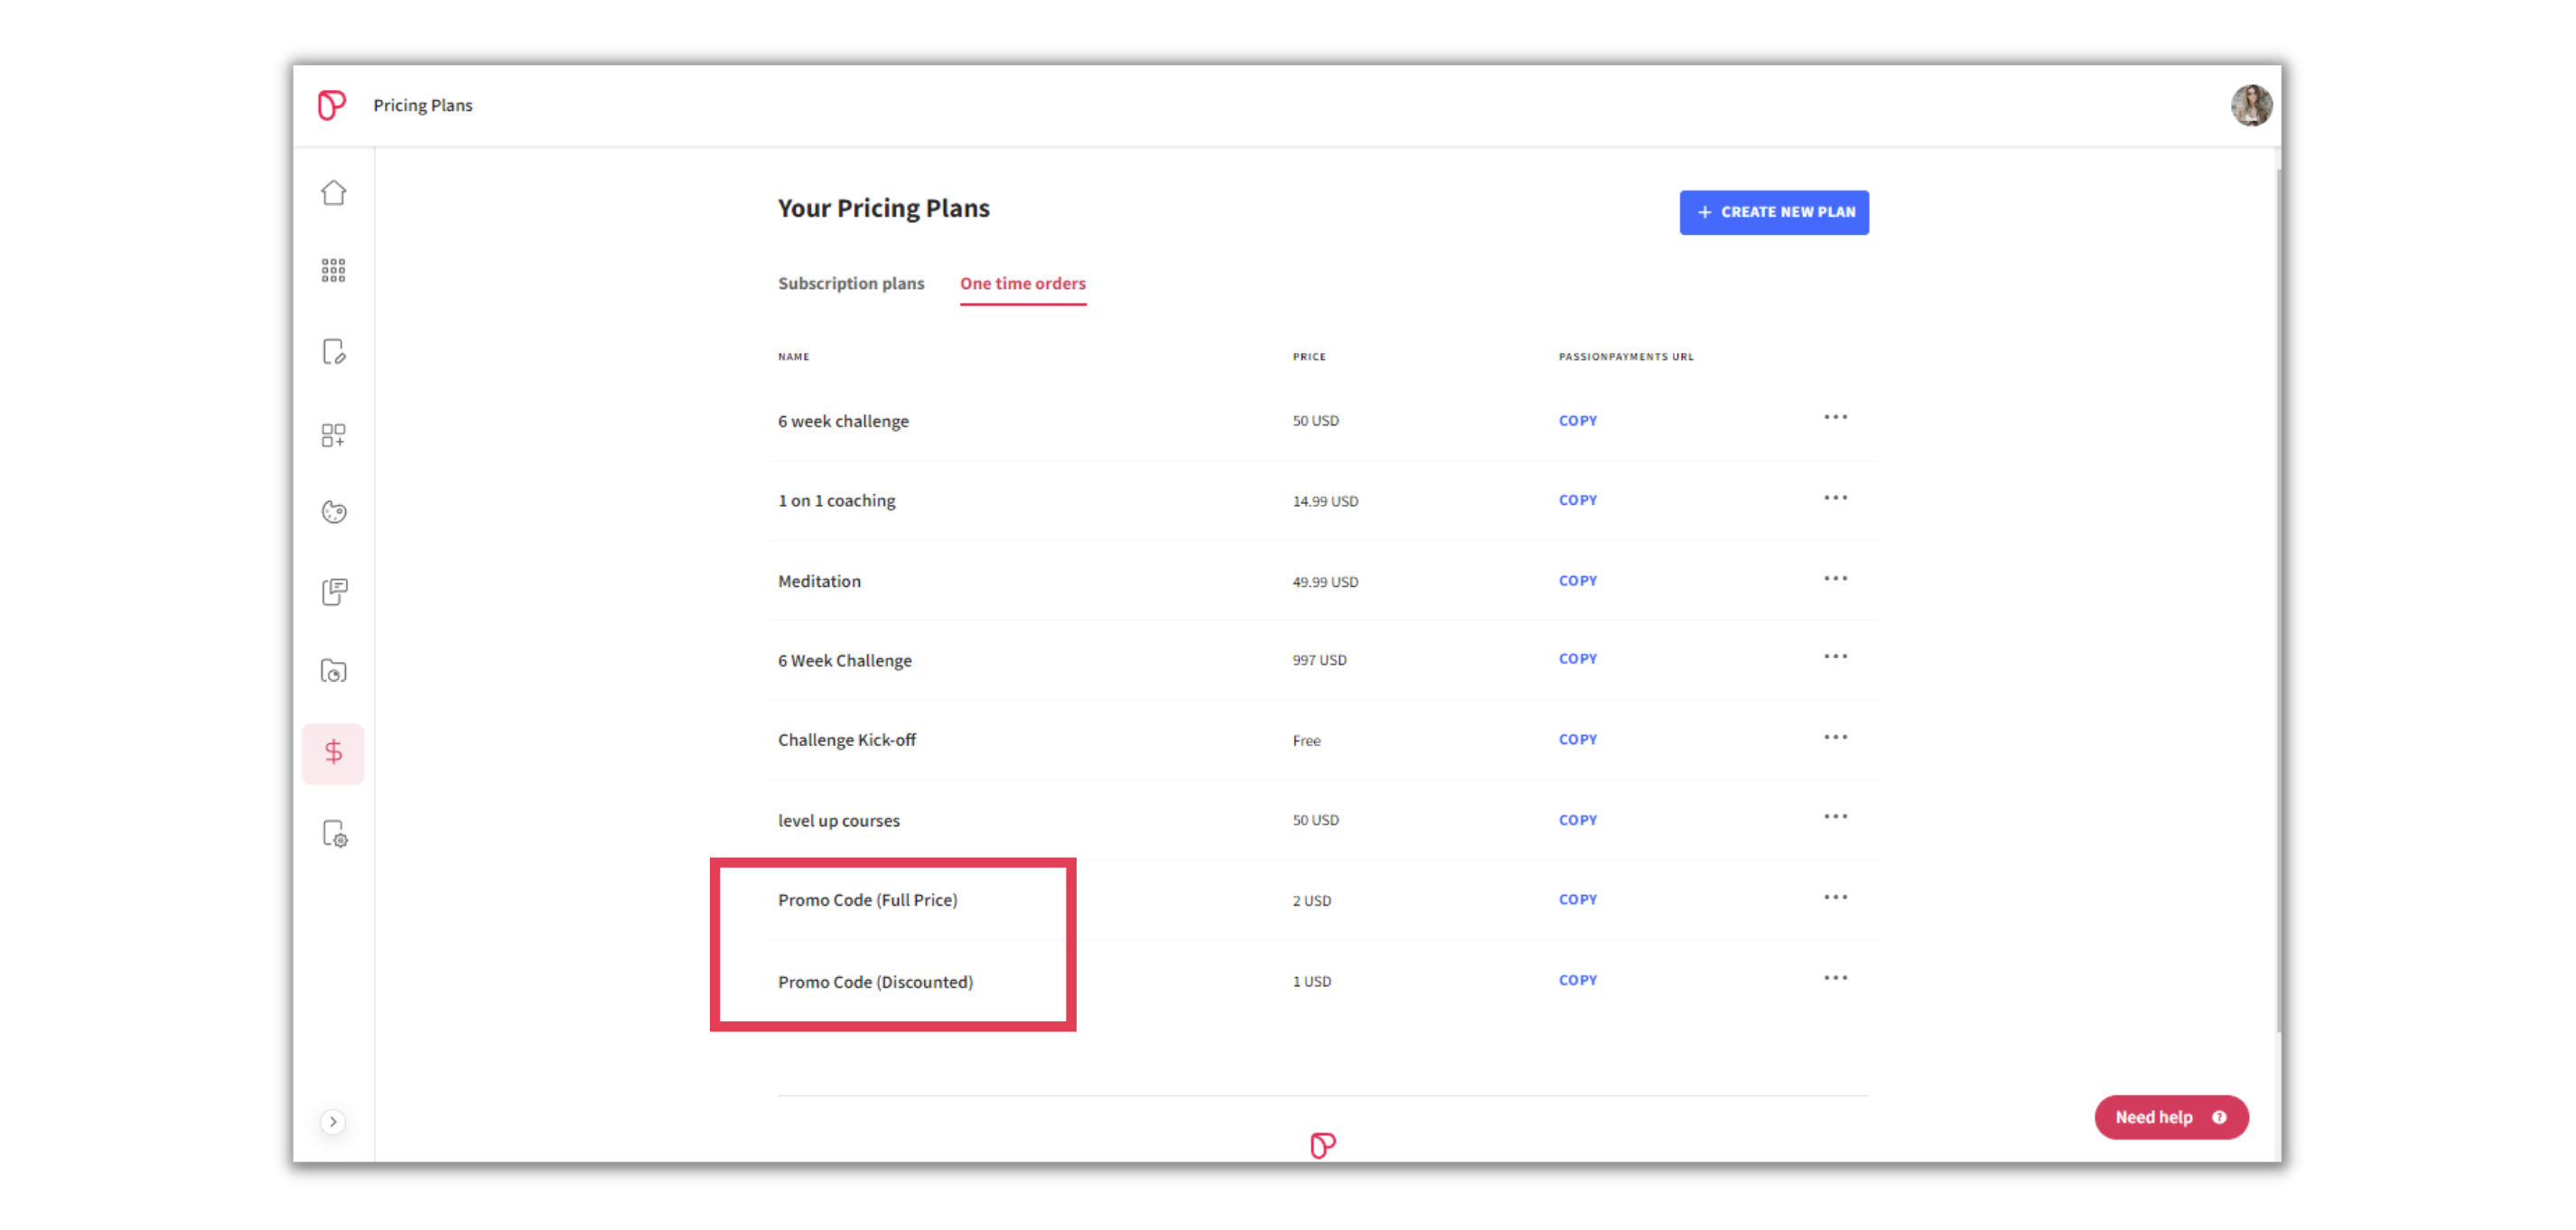
Note: Don't forget to publish the new pricing plans on your web app.
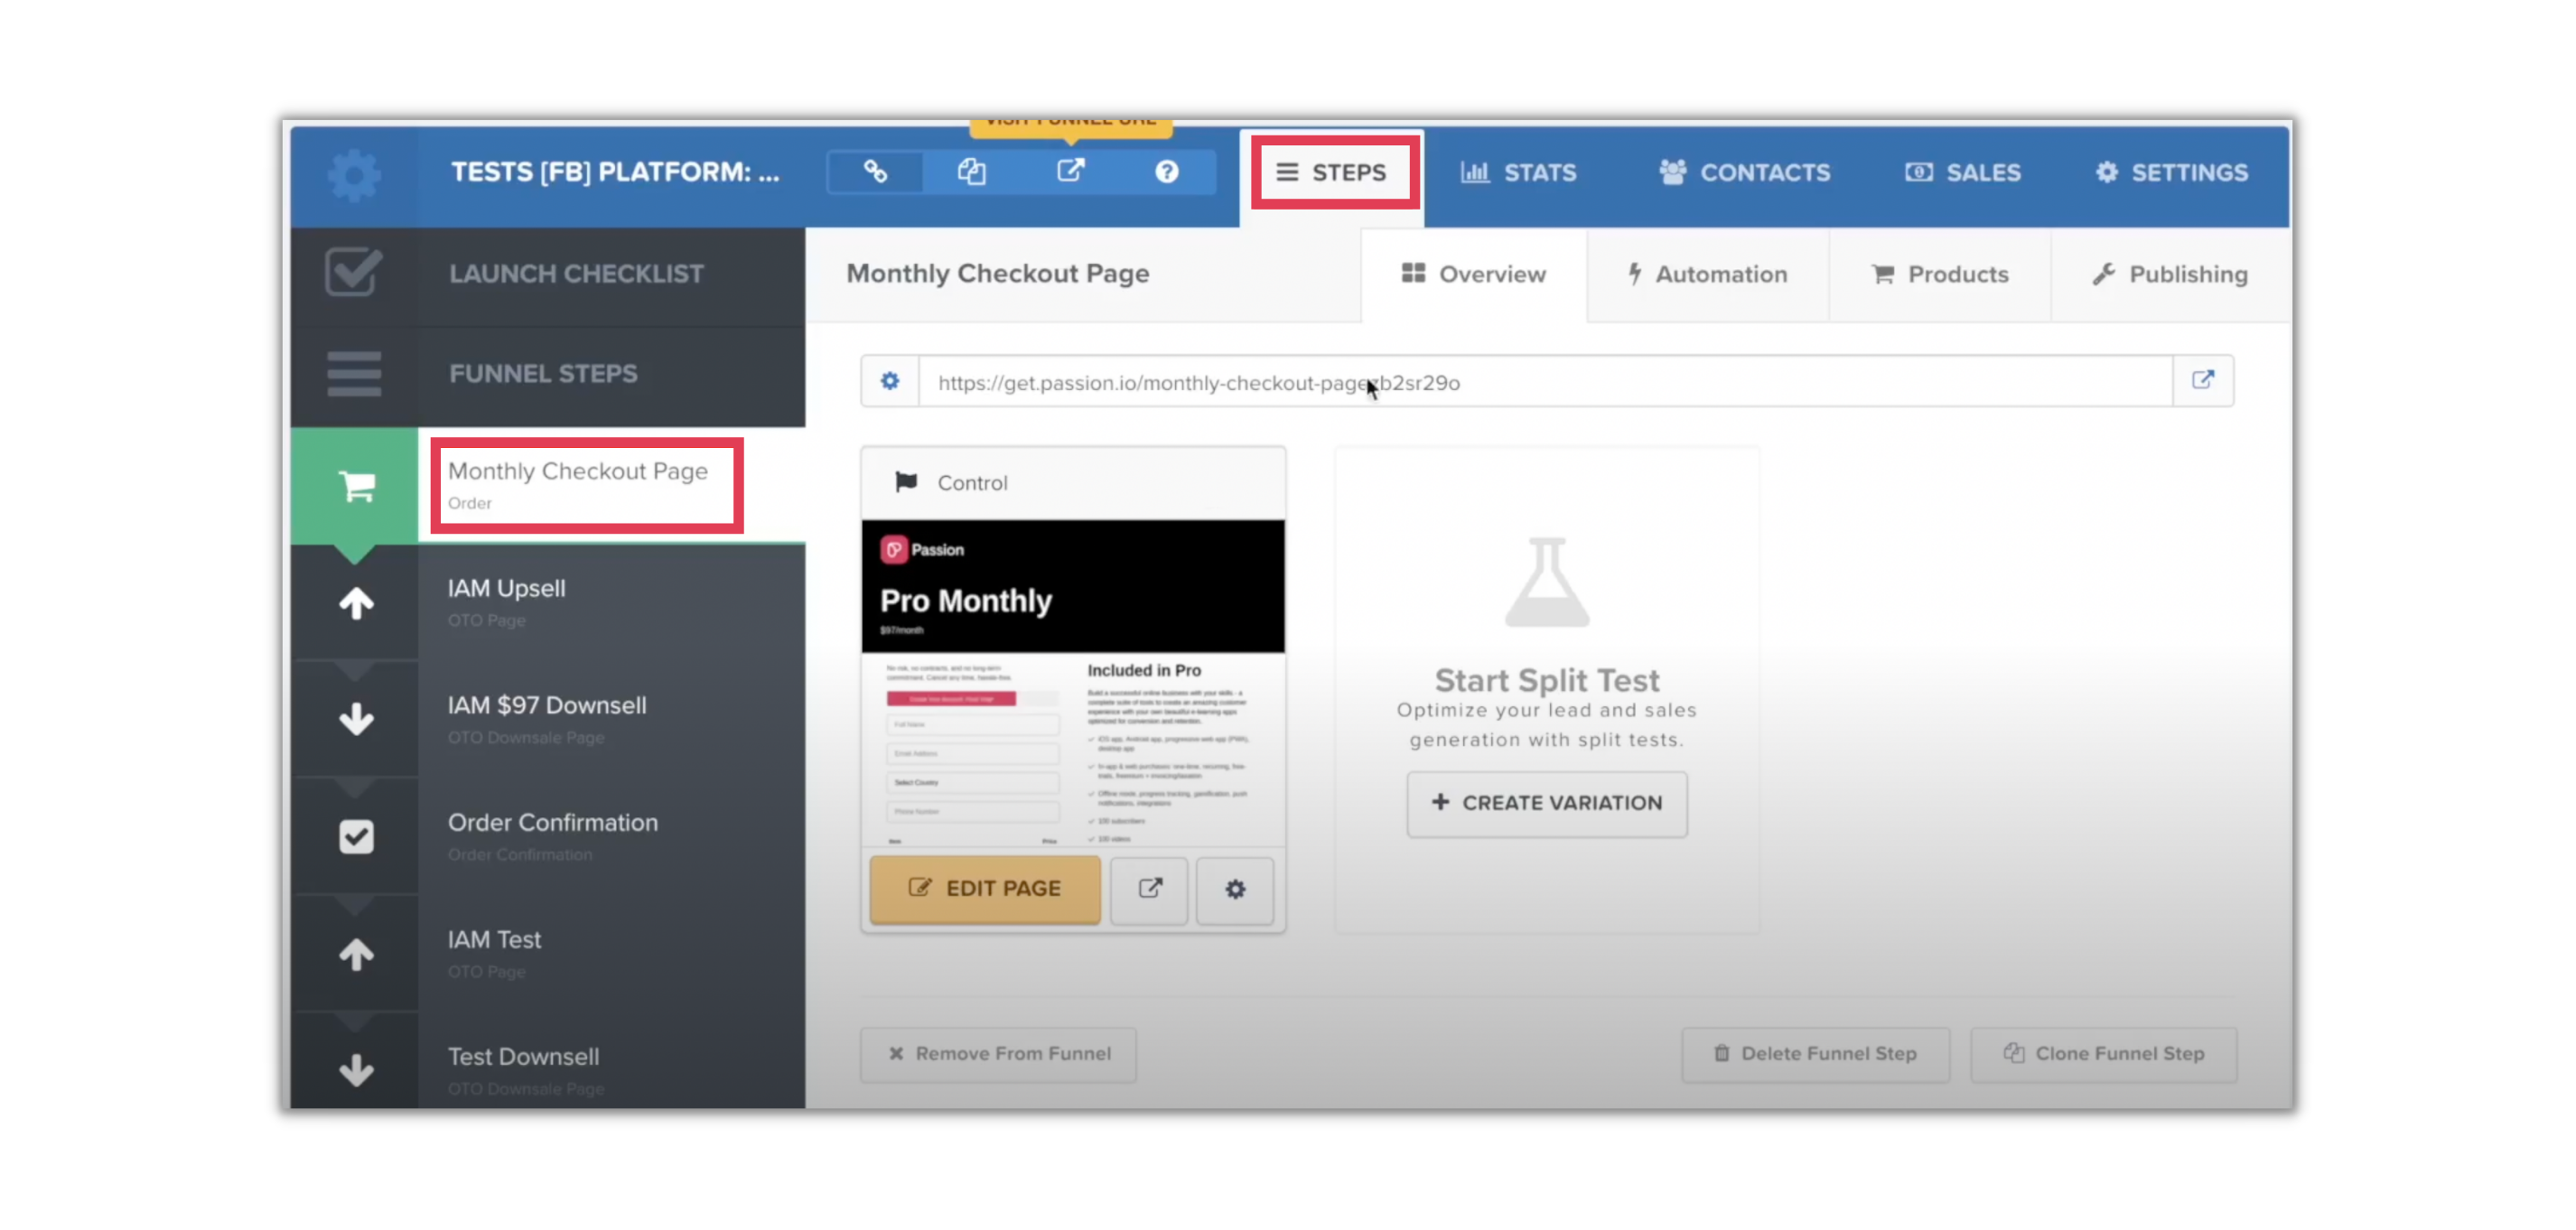
2. Set up a funnel with a checkout page
3. Inside products, set up a full-price and discounted plan
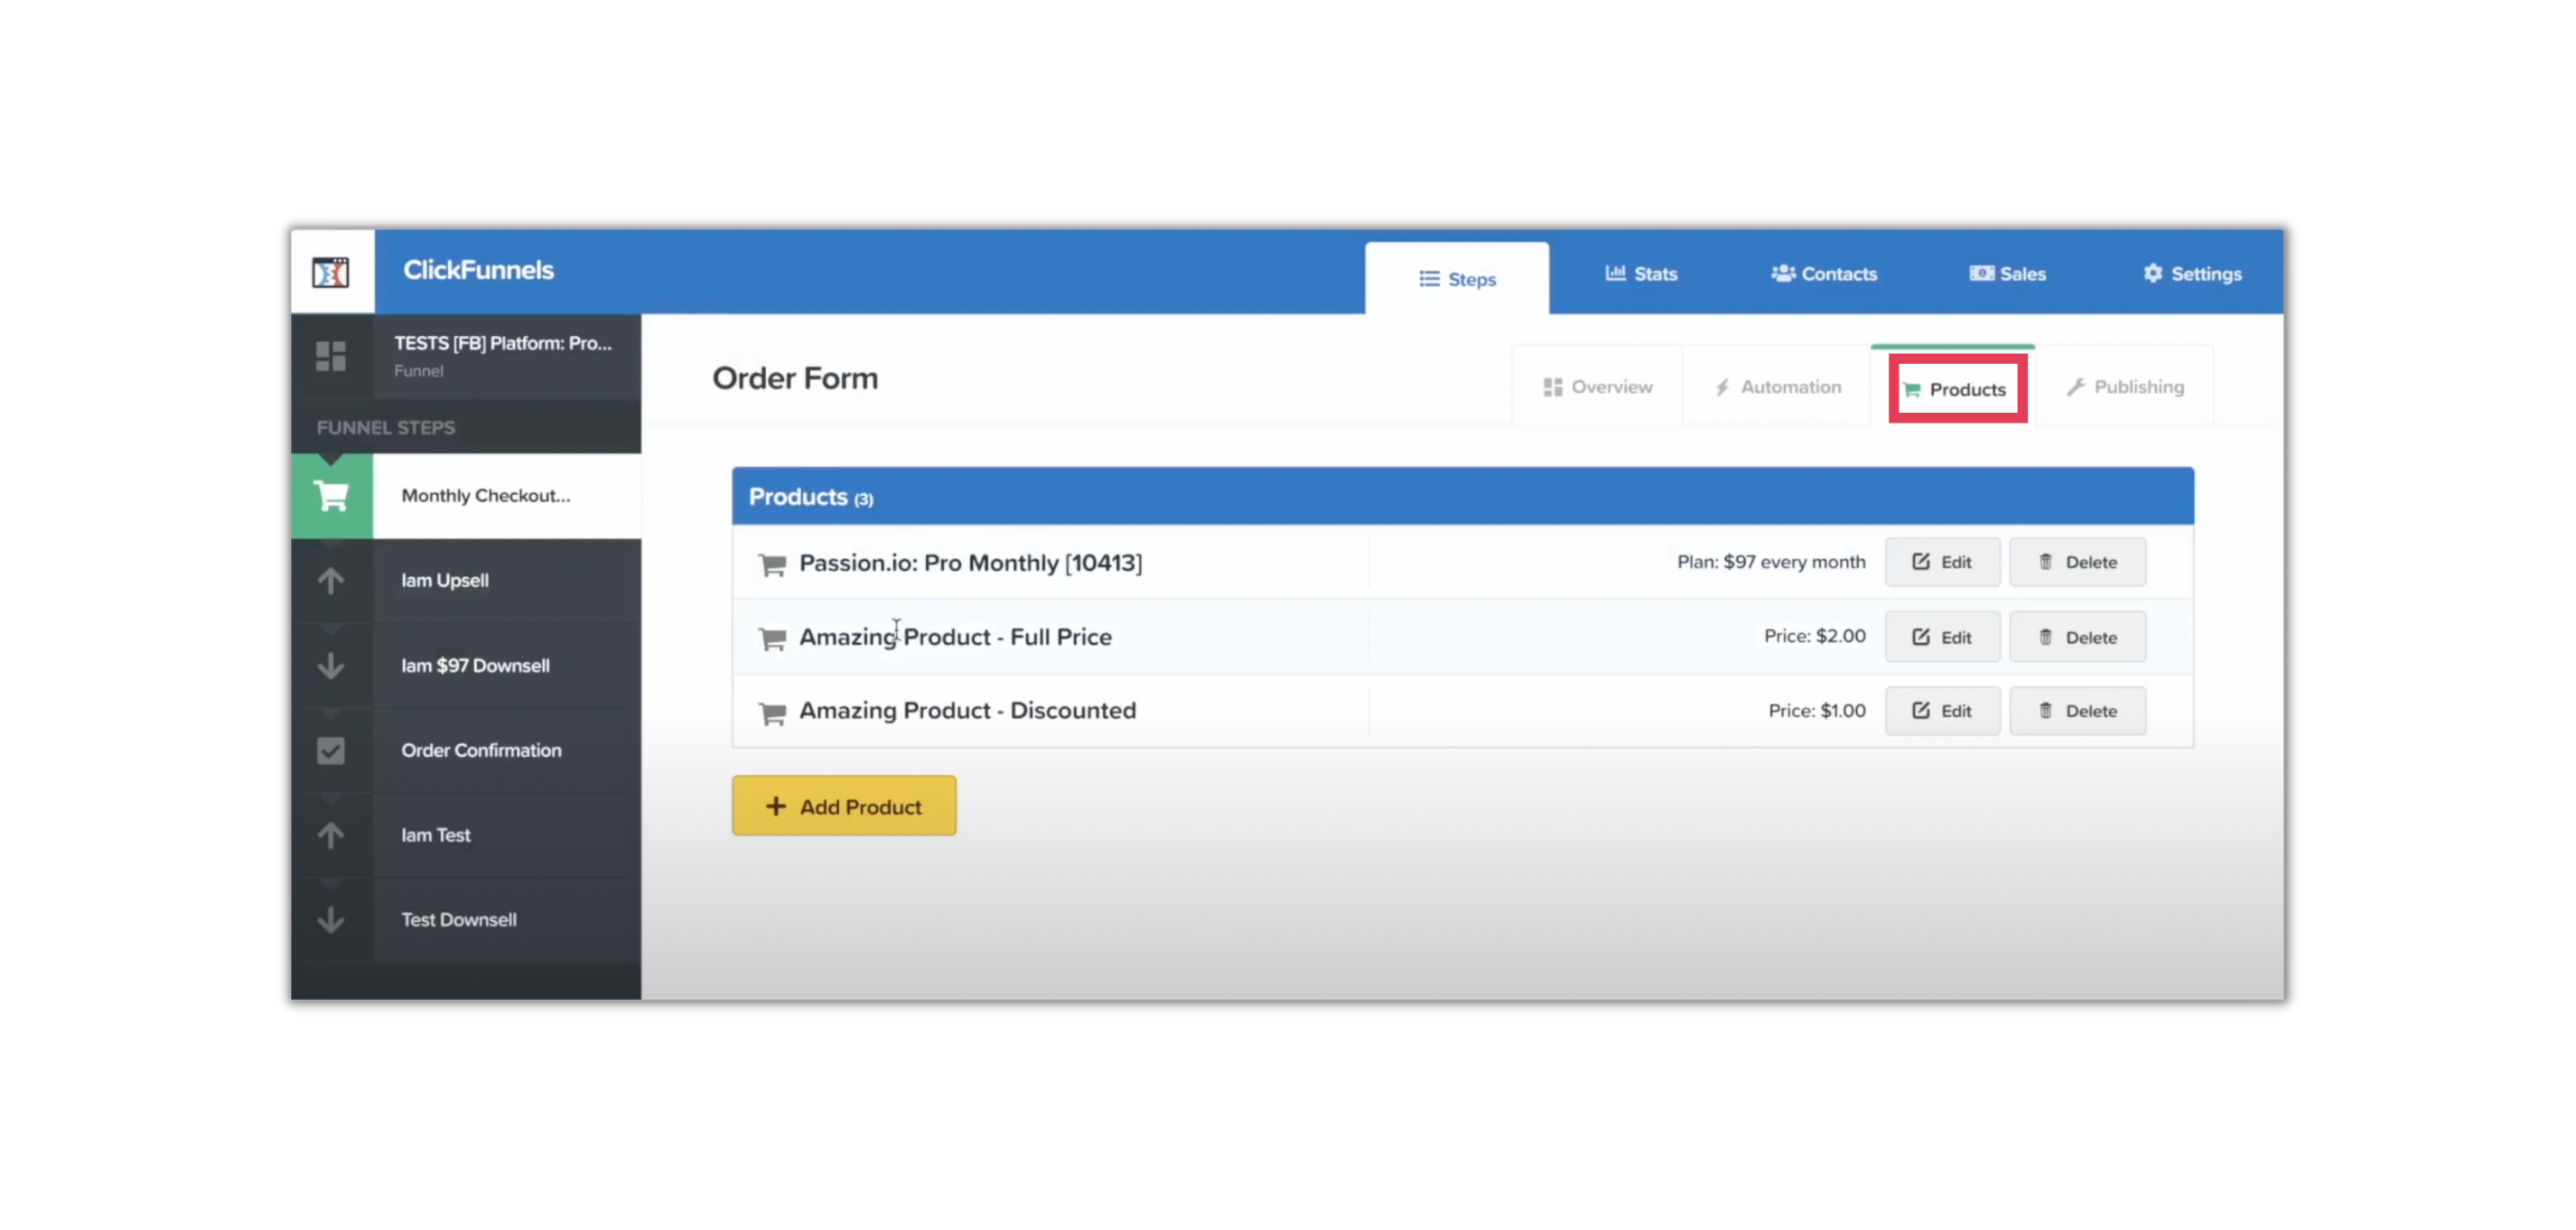
3.1 Right-click on the Edit button and copy the link address of both the Full Price and Discounted

3.2 Paste the two link addresses on your Note Pad first. The highlighted ID number will be used later.
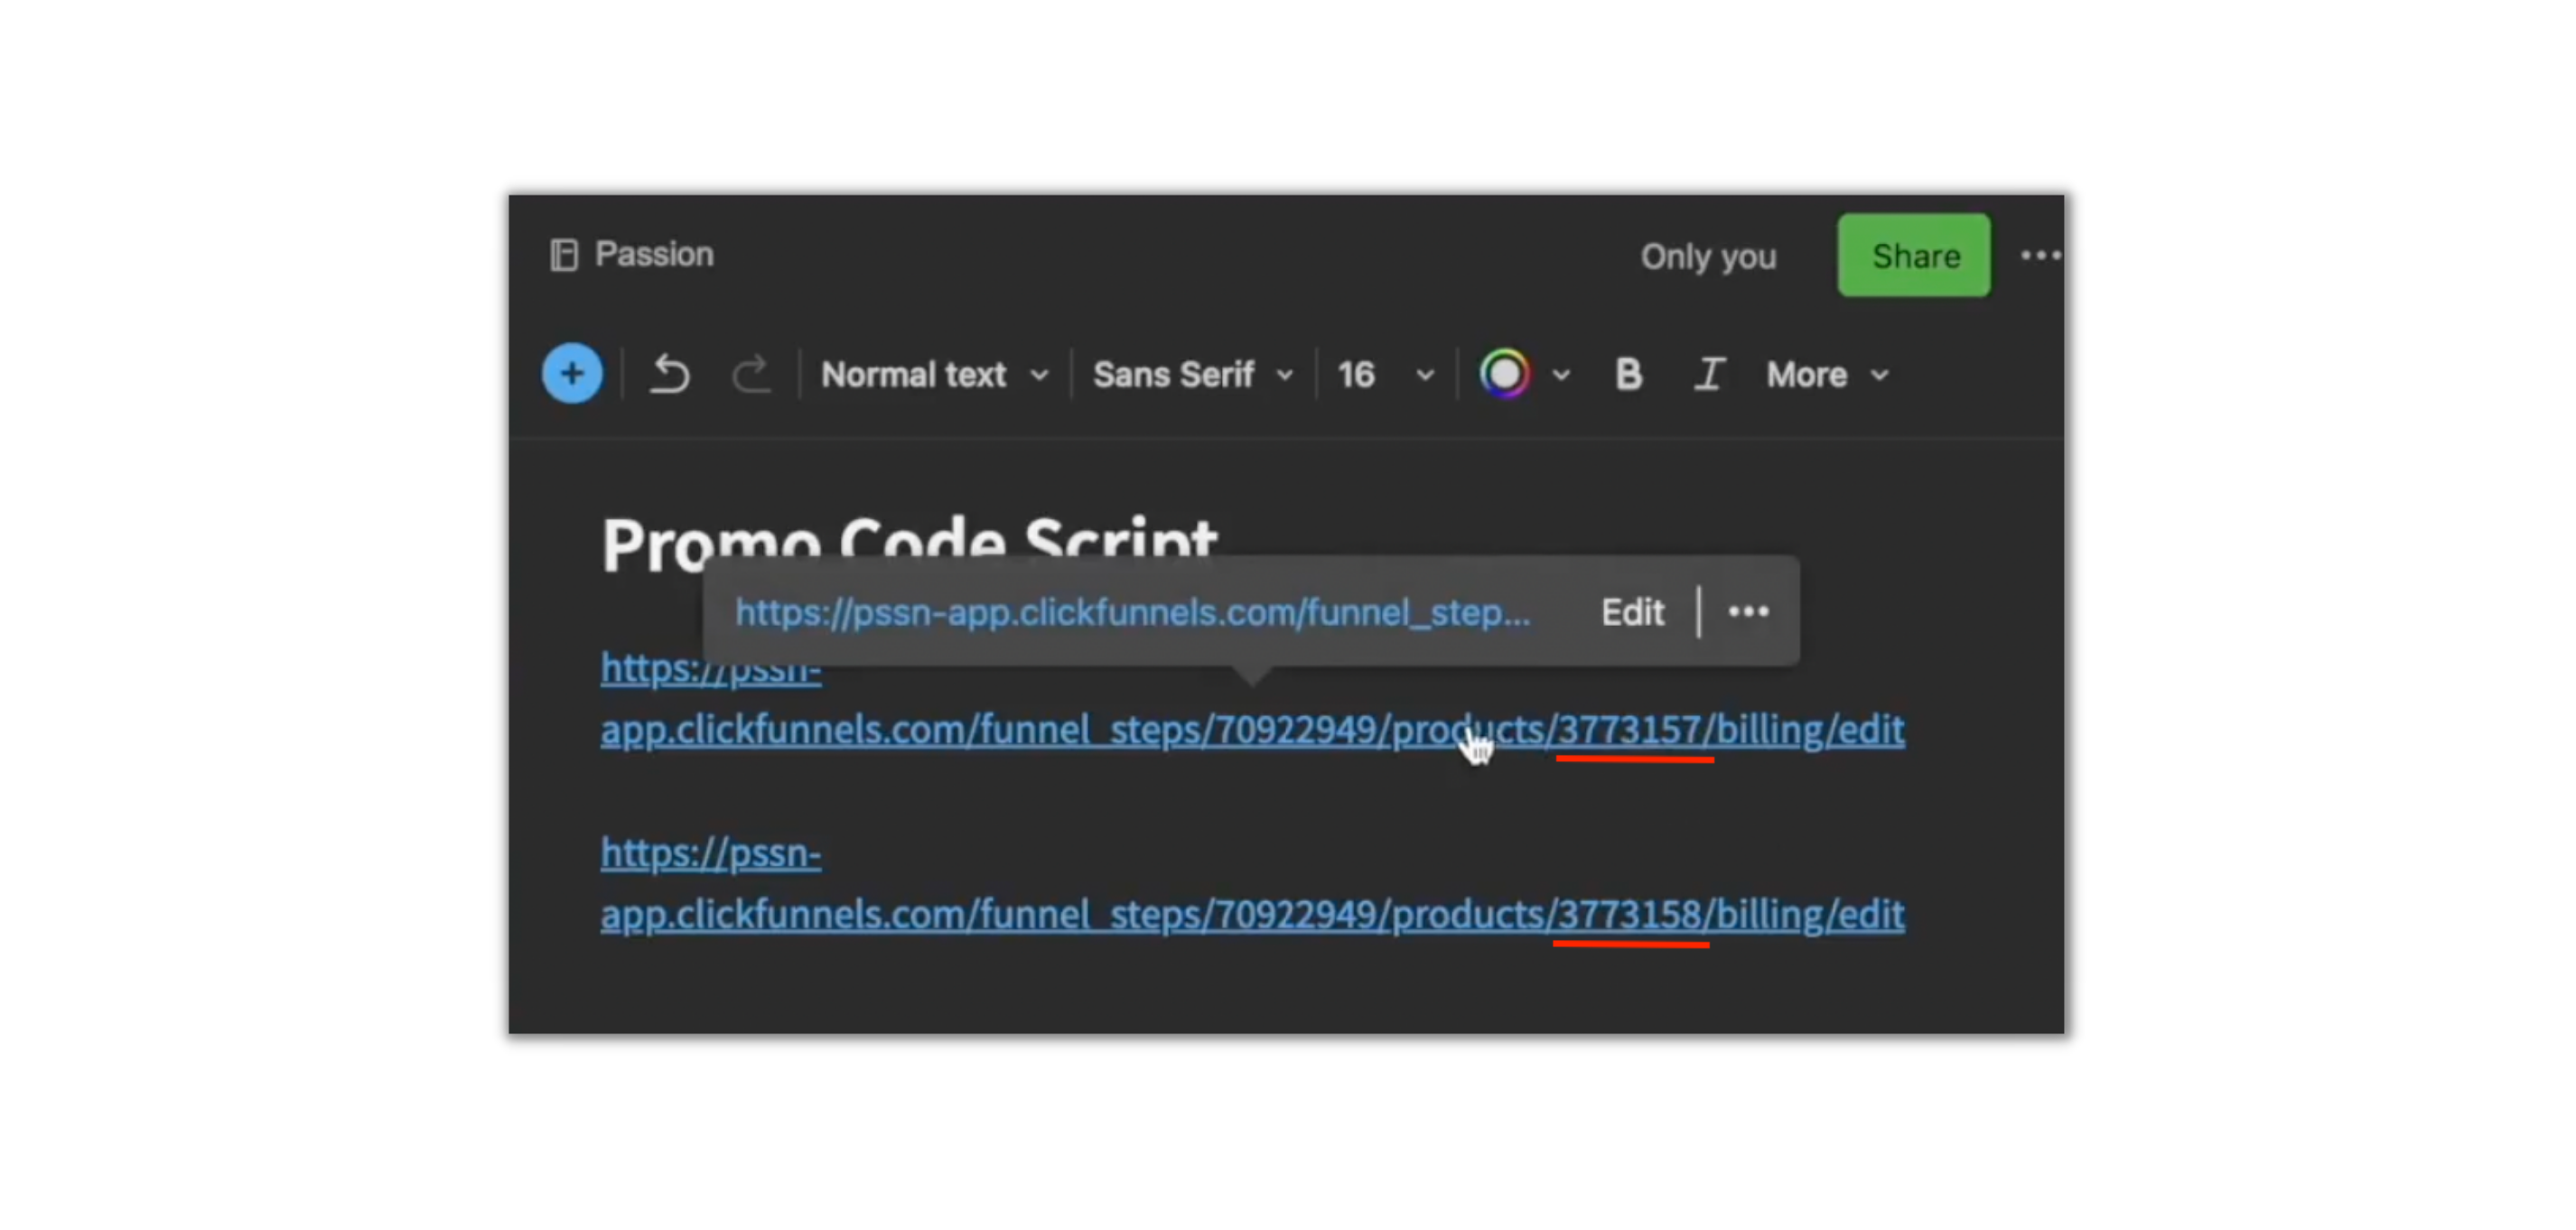
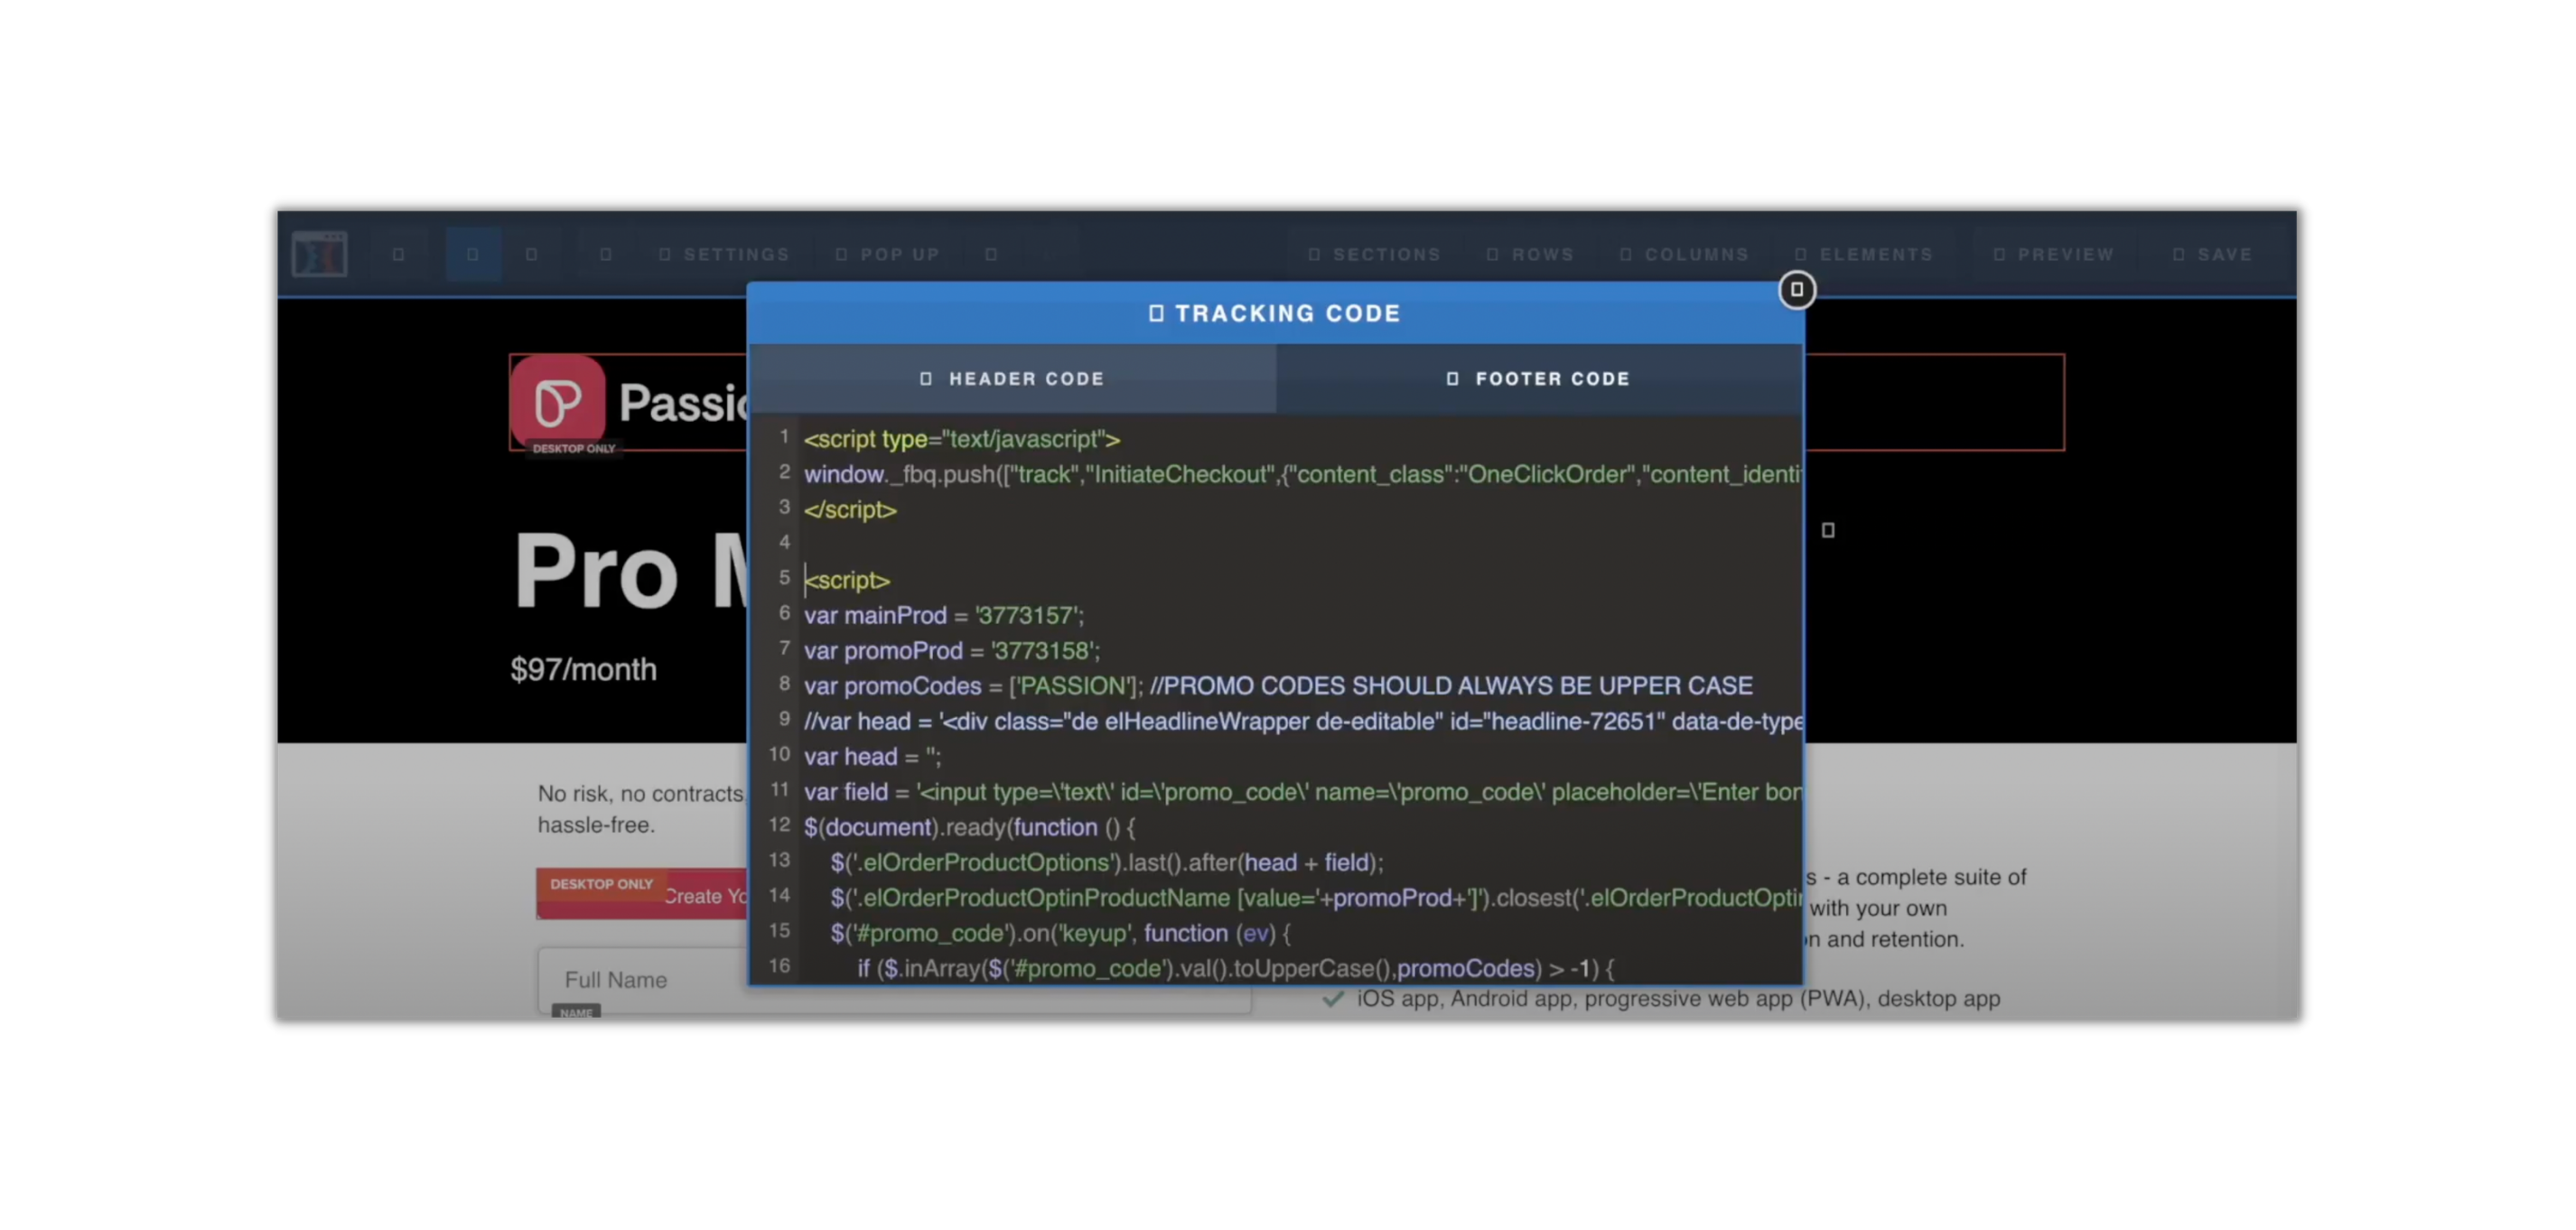
3.2 Copy and paste this code on your NotePad too:
<script>
var mainProd = '3340801';
var promoProd = '3340840';
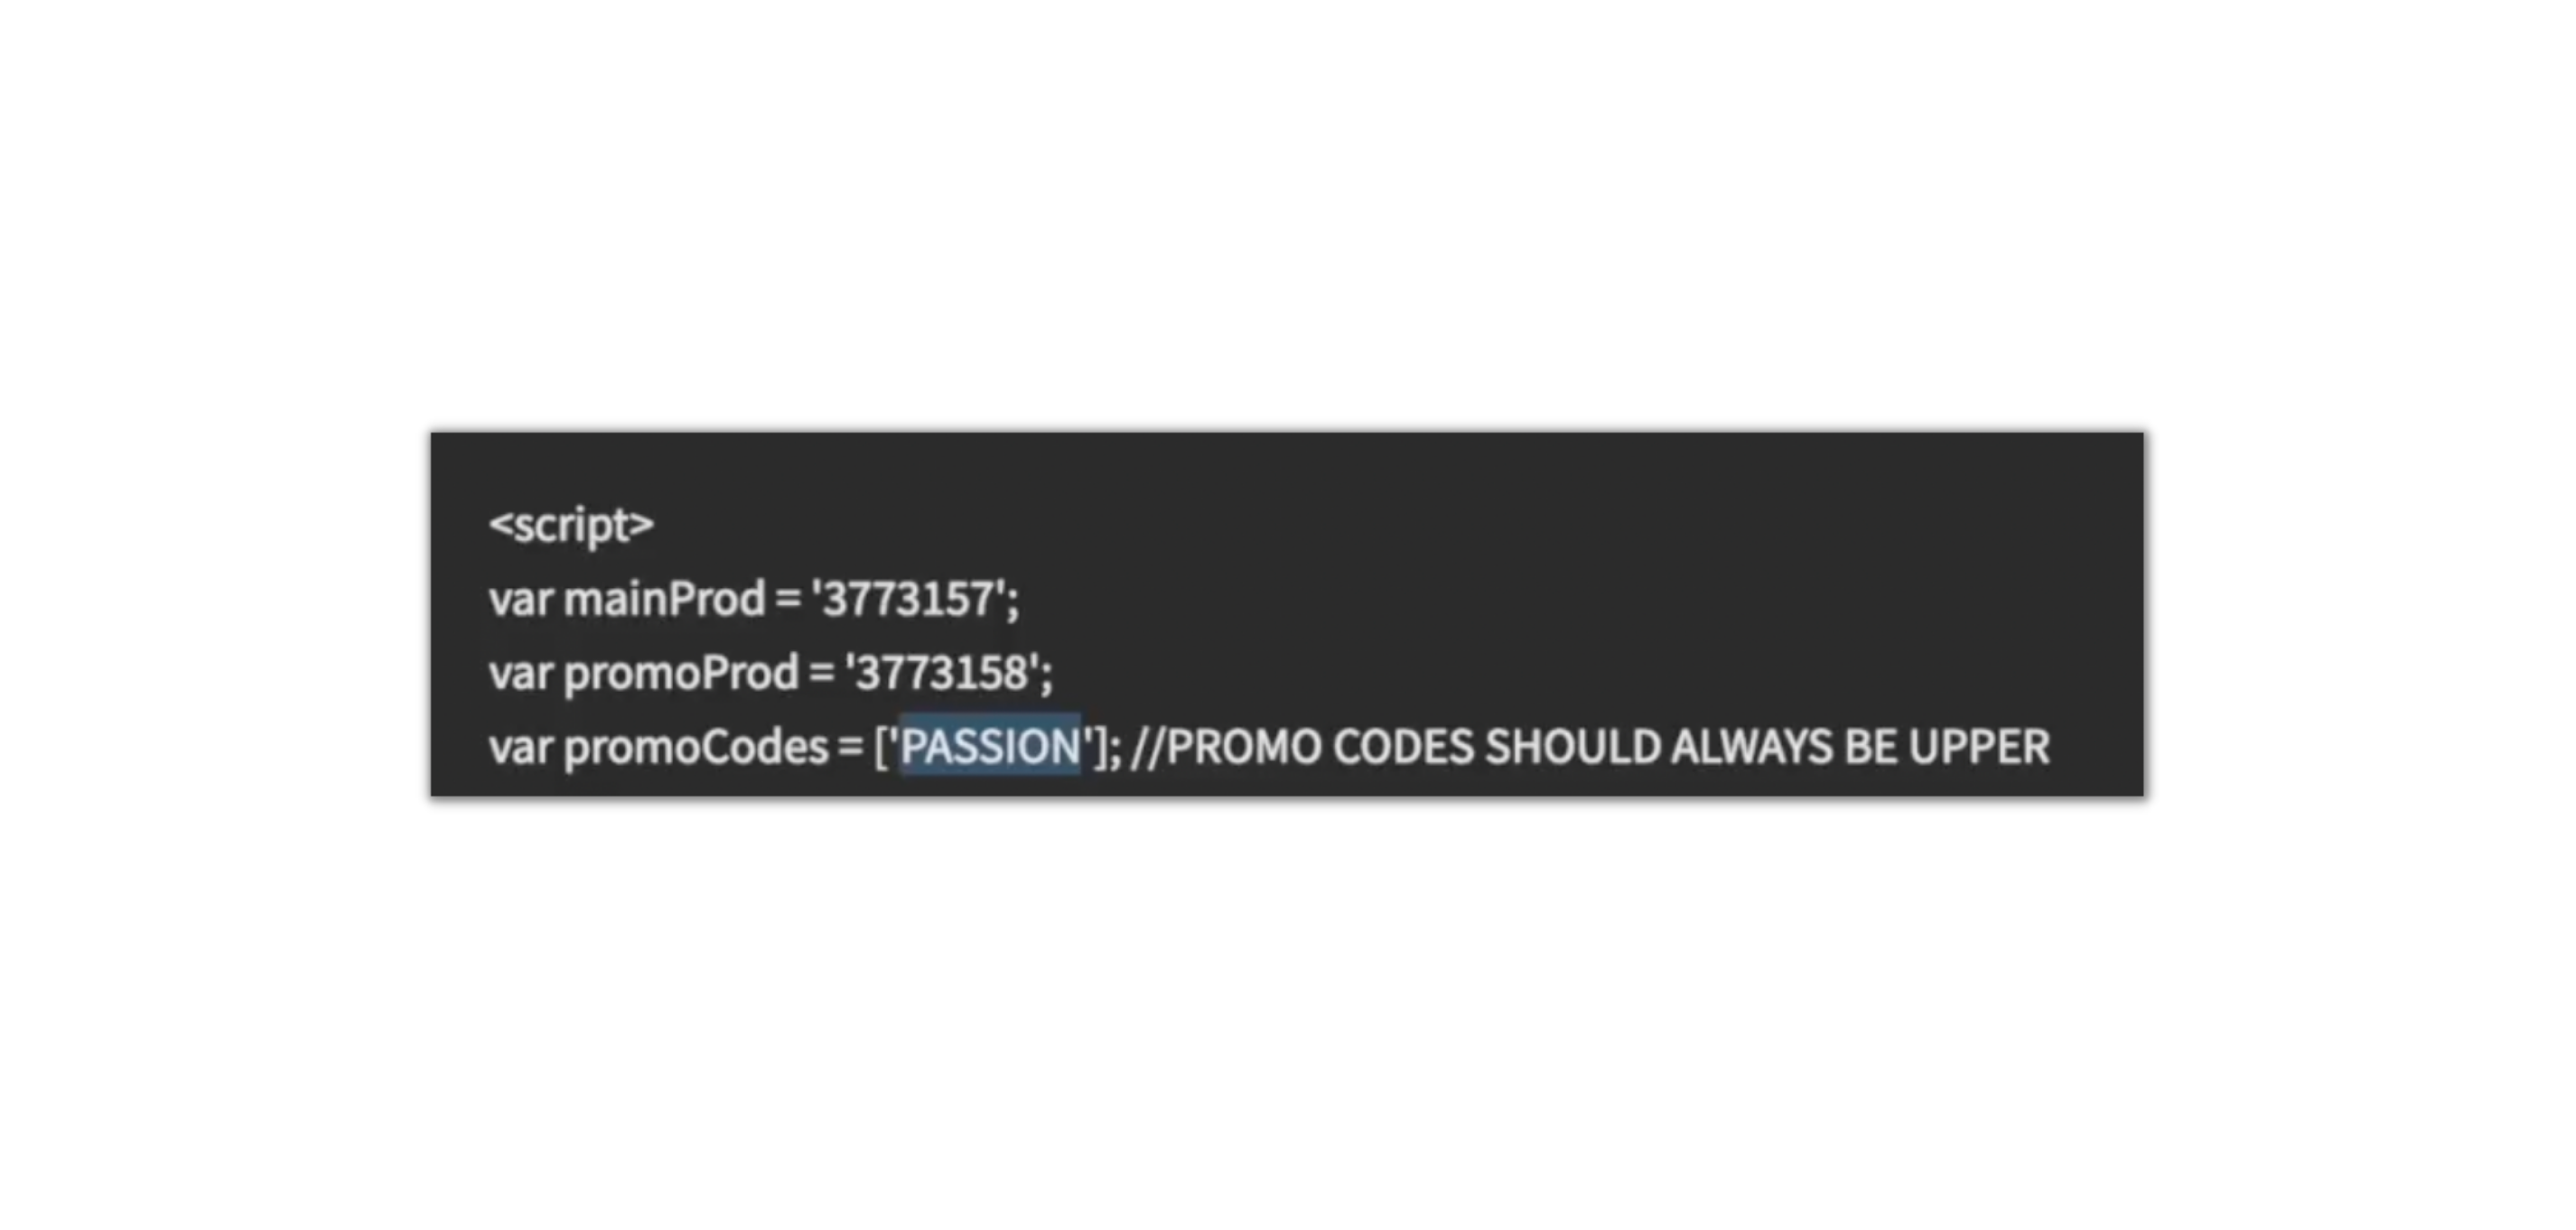
var promoCodes = ['25OFF']; //PROMO CODES SHOULD ALWAYS BE UPPER CASE
//var head = '<div class="de elHeadlineWrapper de-editable" id="headline-72651" data-de-type="headline" data-de-editing="false" data-title="headline" data-ce="true" data-trigger="none" data-animate="fade" data-delay="500" style="margin-top: 20px; cursor: pointer; outline: none; display: block;"><div class="ne elHeadline lh3 elMargin0 elBGStyle0 hsTextShadow0 elFont_raleway hsSize27" style="text-align: left;" data-bold="inherit" contenteditable="false"><b>Have a Promo Code?</b></div></div>';
var head = '';
var field = '<input type=\'text\' id=\'promo_code\' name=\'promo_code\' placeholder=\'Enter promo code...\' class=\'elInput elInput100 elAlign_left elInputSmall elInputStyl0 elInputBG1 elInputBR5 elInputI0 elInputIBlack elInputIRight elInputStyle1 elInputSmall garlic-auto-save\' />';
$(document).ready(function () {
$('.elOrderProductOptions').last().after(head + field);
$('.elOrderProductOptinProductName [value='+promoProd+']').closest('.elOrderProductOptinProducts').hide();
$('#promo_code').on('keyup', function (ev) {
if ($.inArray($('#promo_code').val().toUpperCase(),promoCodes) > -1) {
$('.elOrderProductOptinProductName [value='+promoProd+']').click();
$('.elOrderProductOptinProductName [value='+mainProd+']').closest('.elOrderProductOptinProducts').hide();
$('.elOrderProductOptinProductName [value='+promoProd+']').closest('.elOrderProductOptinProducts').show();
} else {
$('.elOrderProductOptinProductName [value='+mainProd+']').click();
$('.elOrderProductOptinProductName [value='+promoProd+']').closest('.elOrderProductOptinProducts').hide();
$('.elOrderProductOptinProductName [value='+mainProd+']').closest('.elOrderProductOptinProducts').show();
}
});
});
</script>
3.3 Replace the script var mainProd's ID with the full price and discounted product ID as shown in the example below.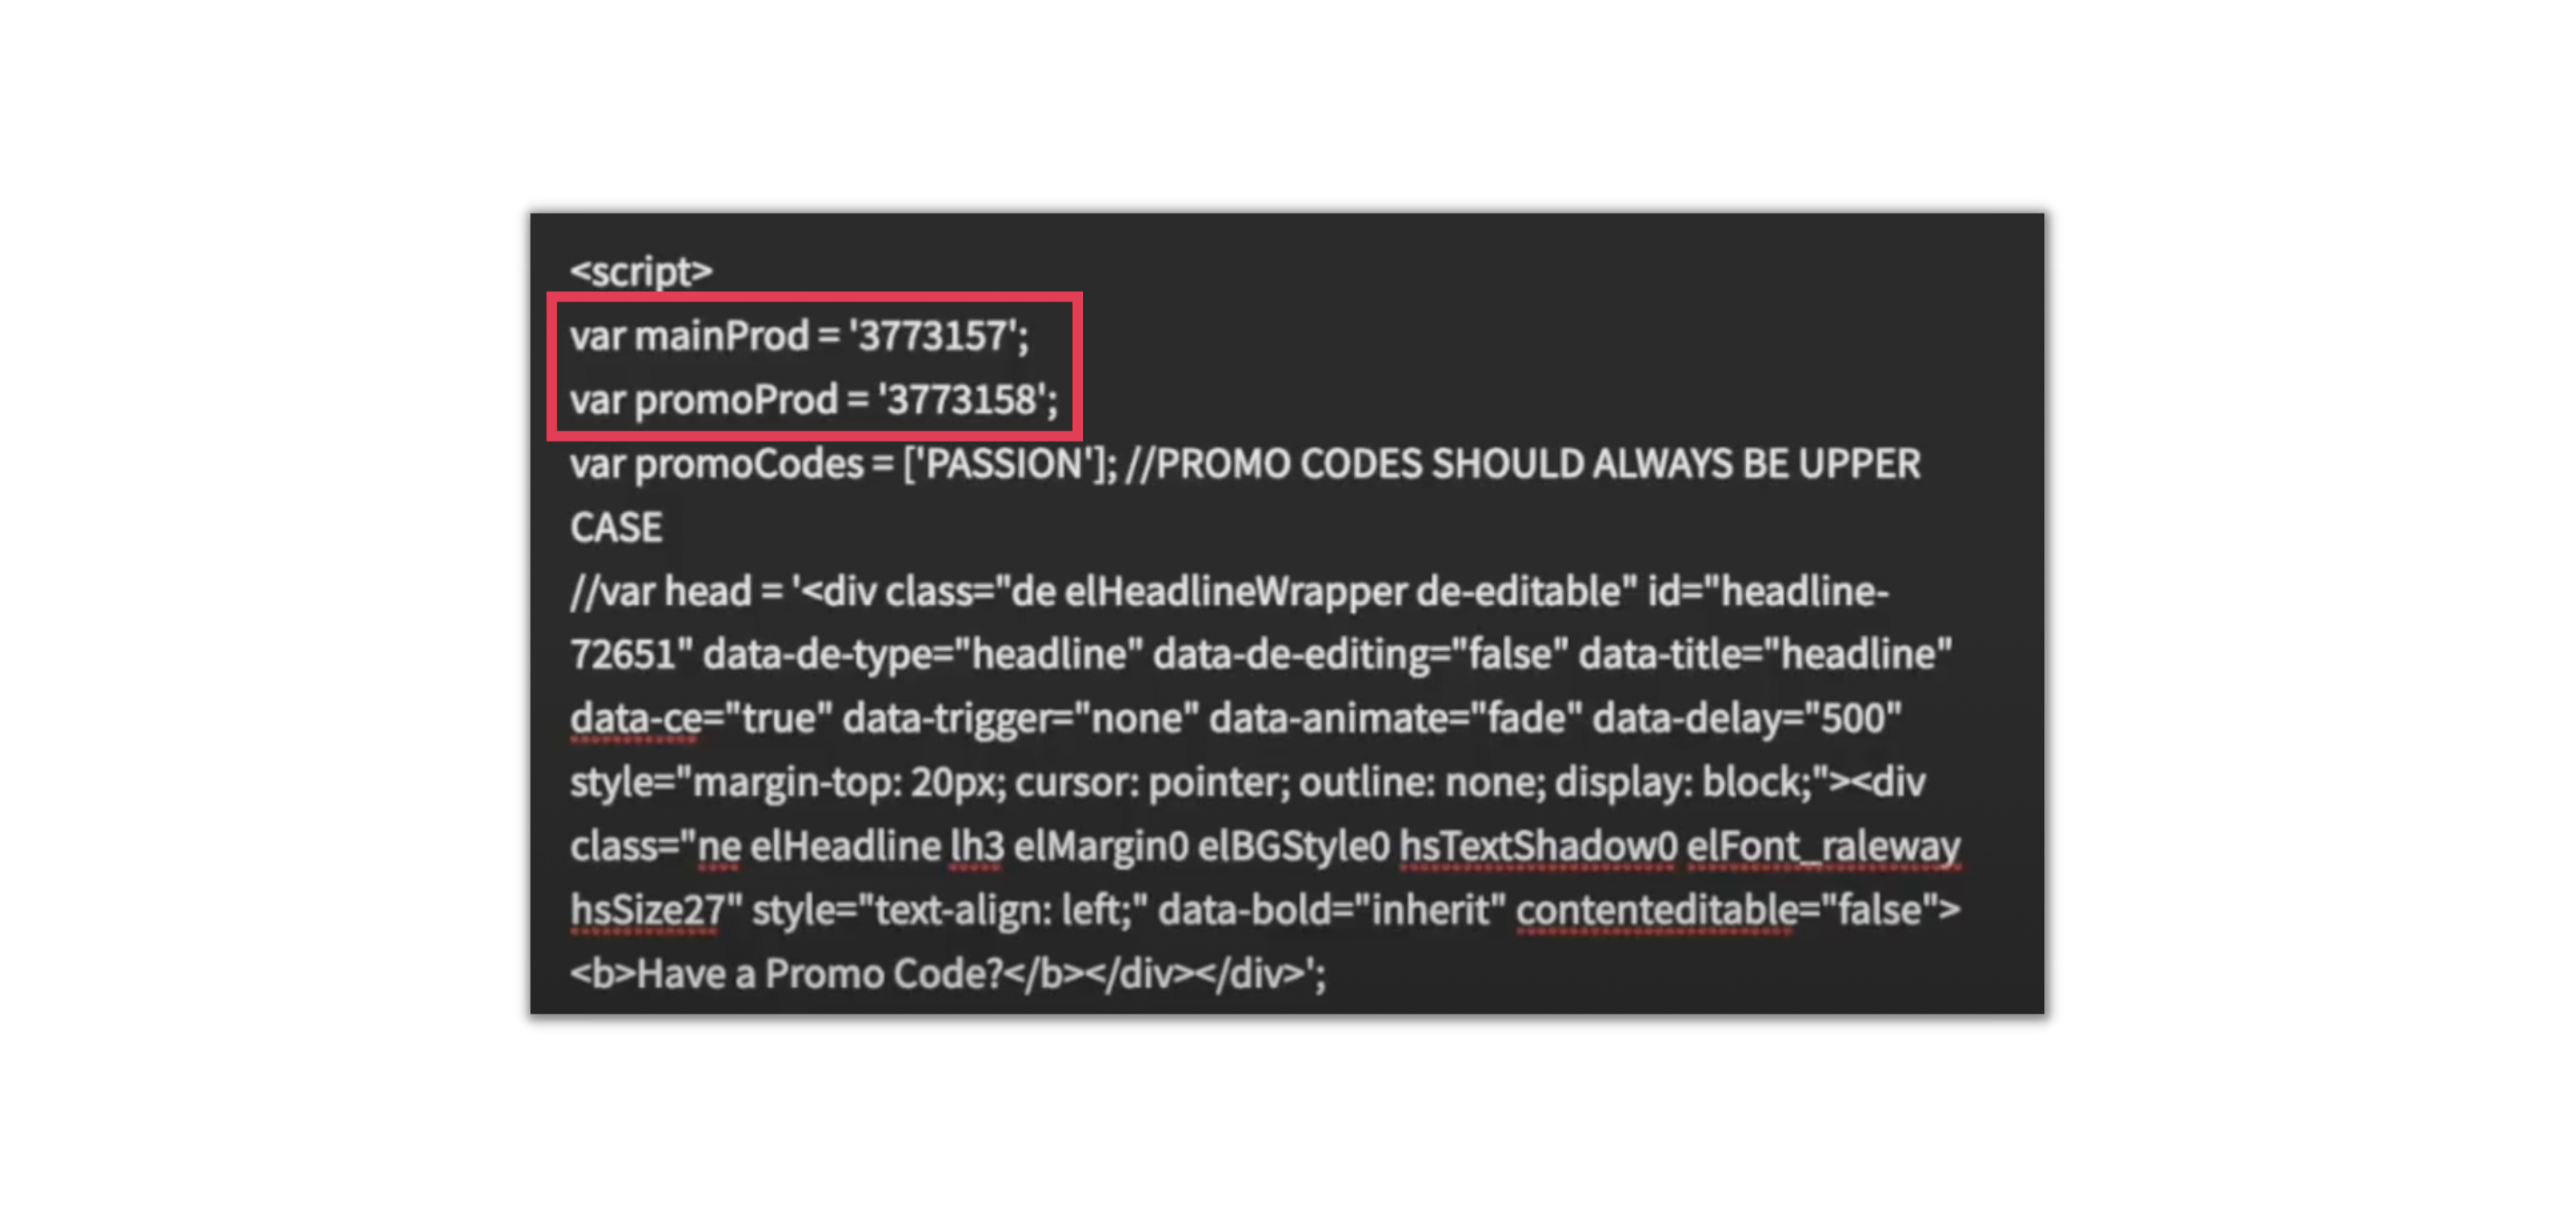
3.4 Choose the promo code (e.g. PASSION) that you prefer and make sure it is in capital letters. Save all these for later.
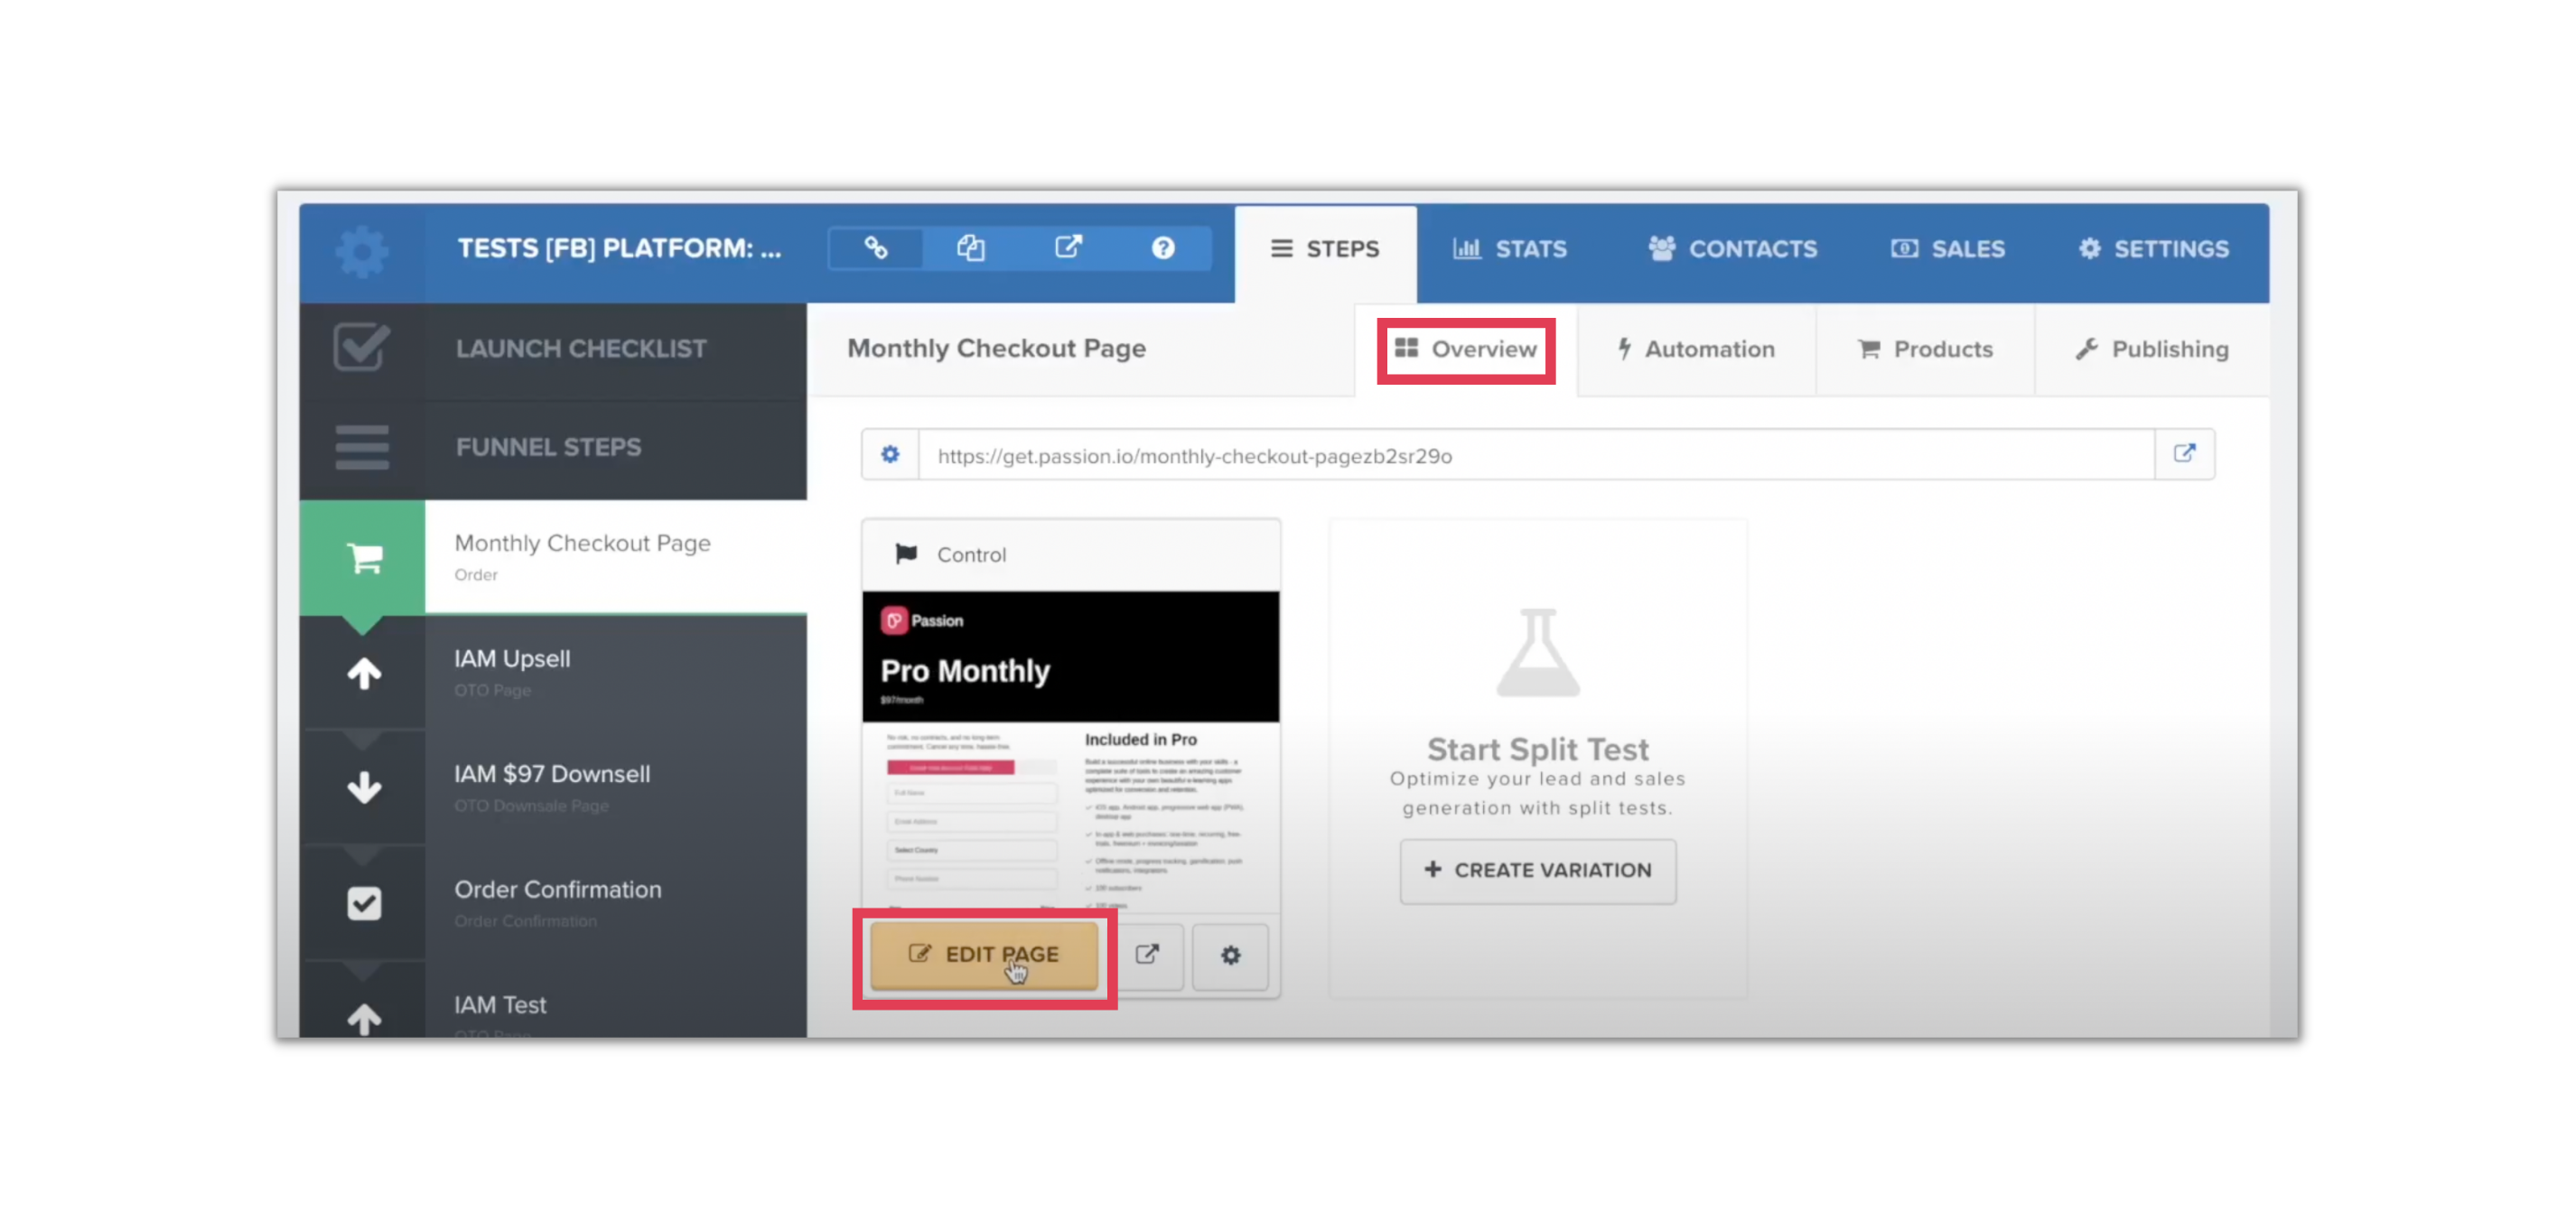
4. Go back into your funnel > Overview of Checkout Page > Click Edit Page
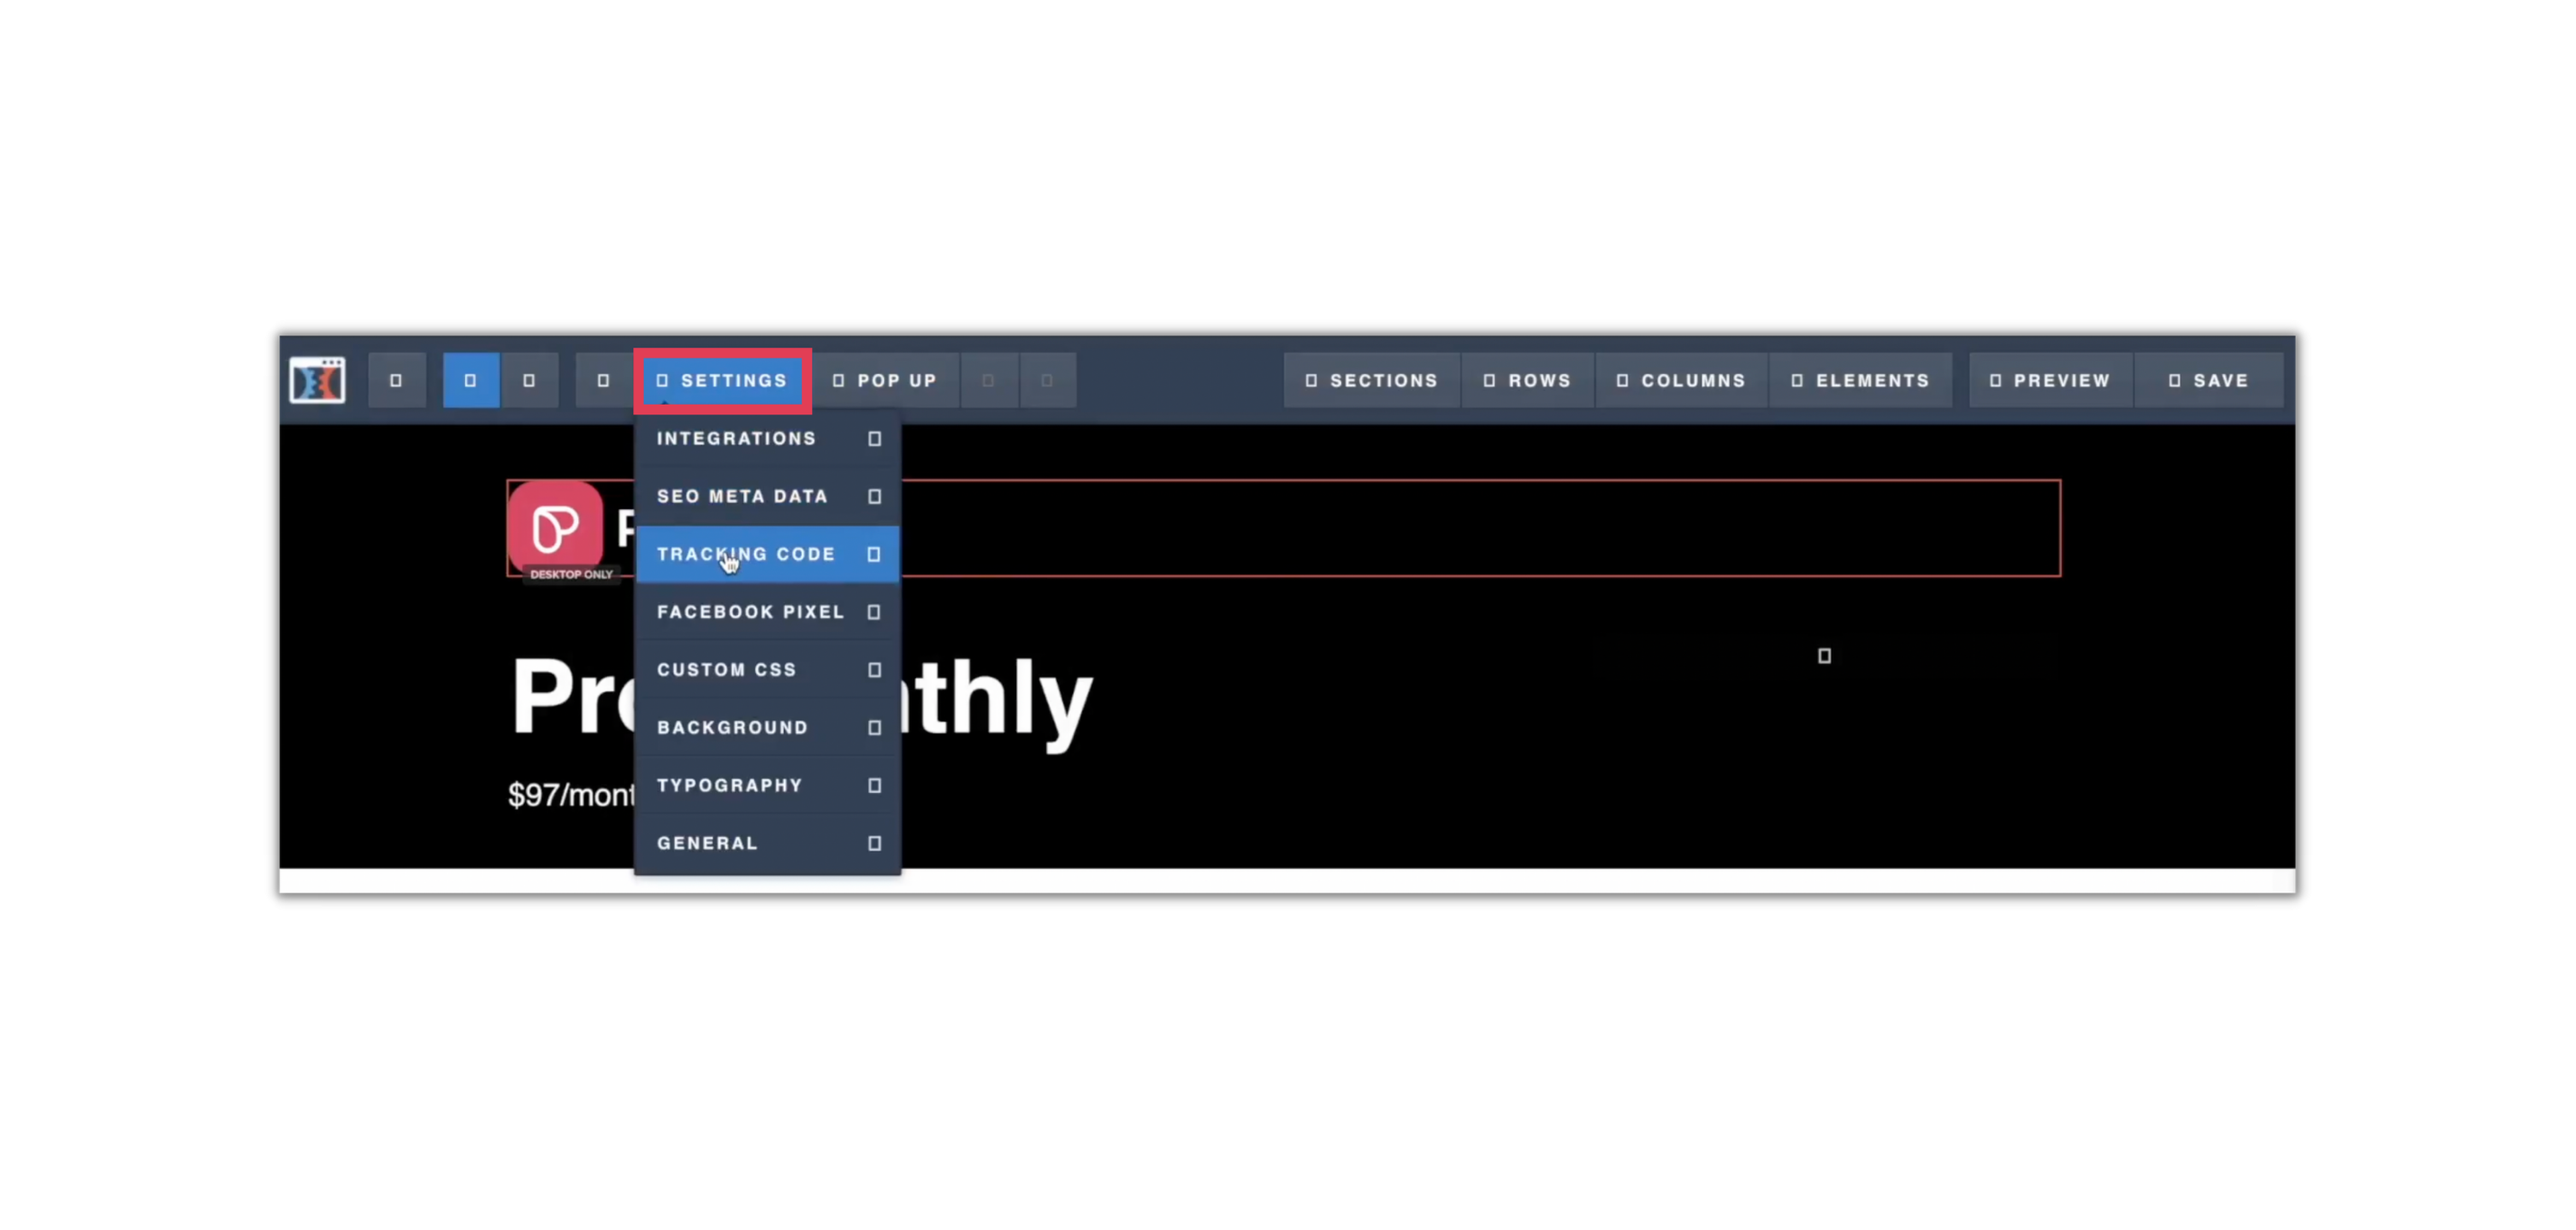
5. Click on Settings > Tracking Code > Footer Code
5.1 Paste the code from your notepad (the code from Step 3)
5.2 Click Save, then click Preview
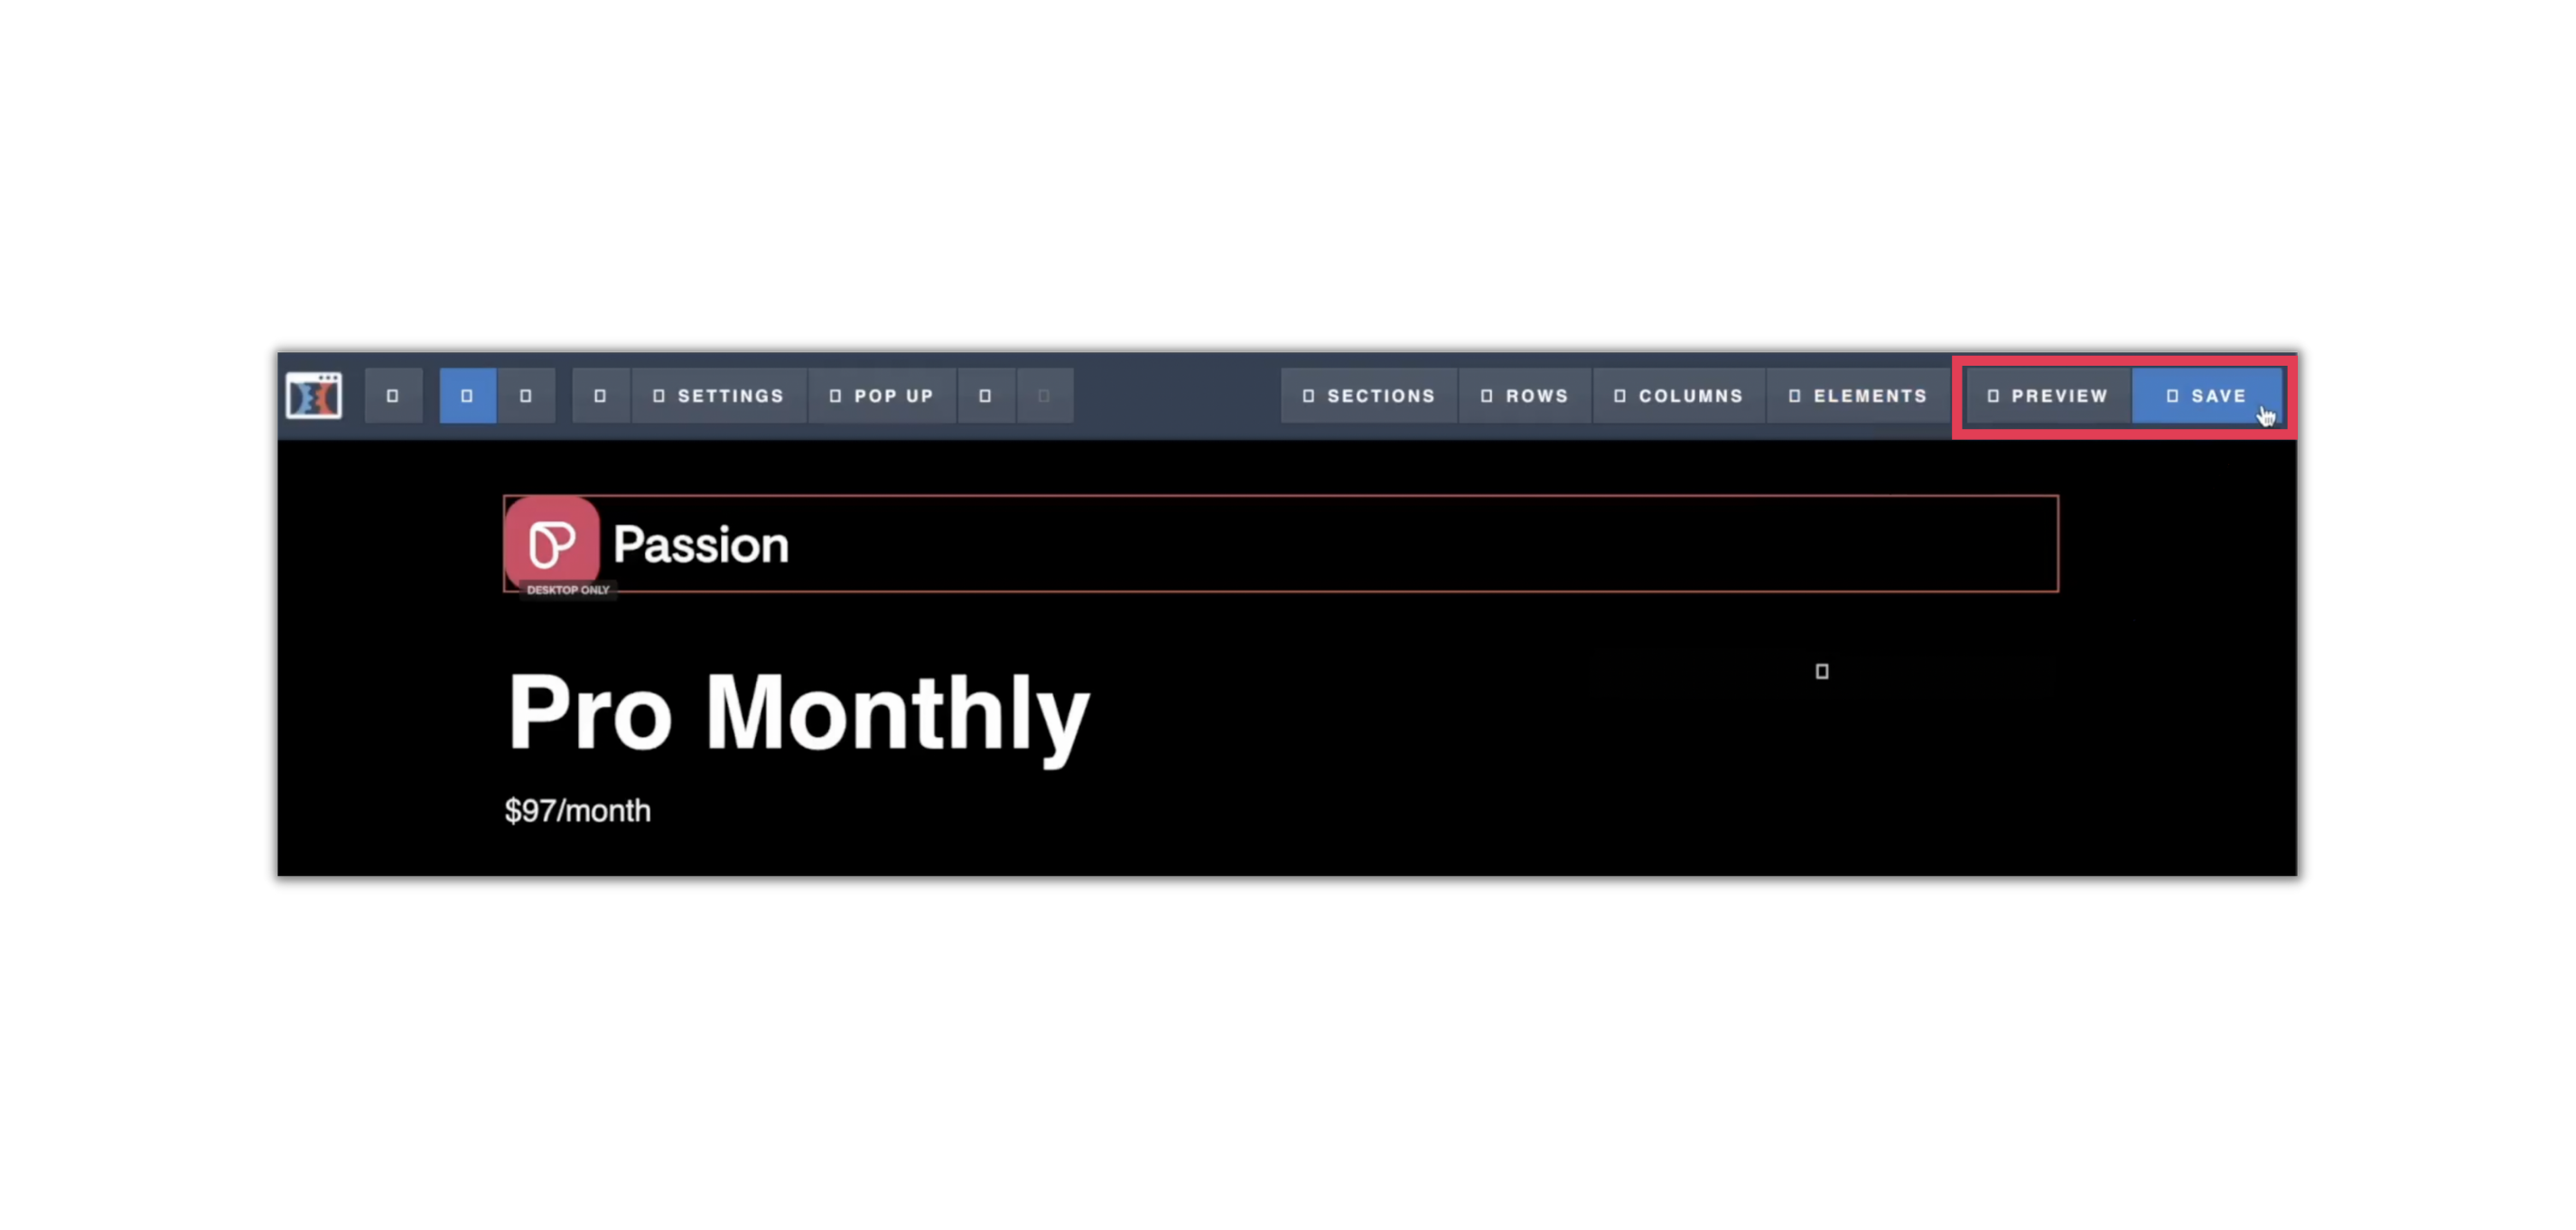
6. When you do the preview, the bonus code field should appear. To test if it’s working, try typing the code in the bonus code field. Once the code is in the field, the price should change from full to discounted.
2. Connect the ClickFunnels checkout page to your Passion.io account
For your clients to have access to the correct content and receive an email with the instructions to set up a password, proceed with Zapier integration:
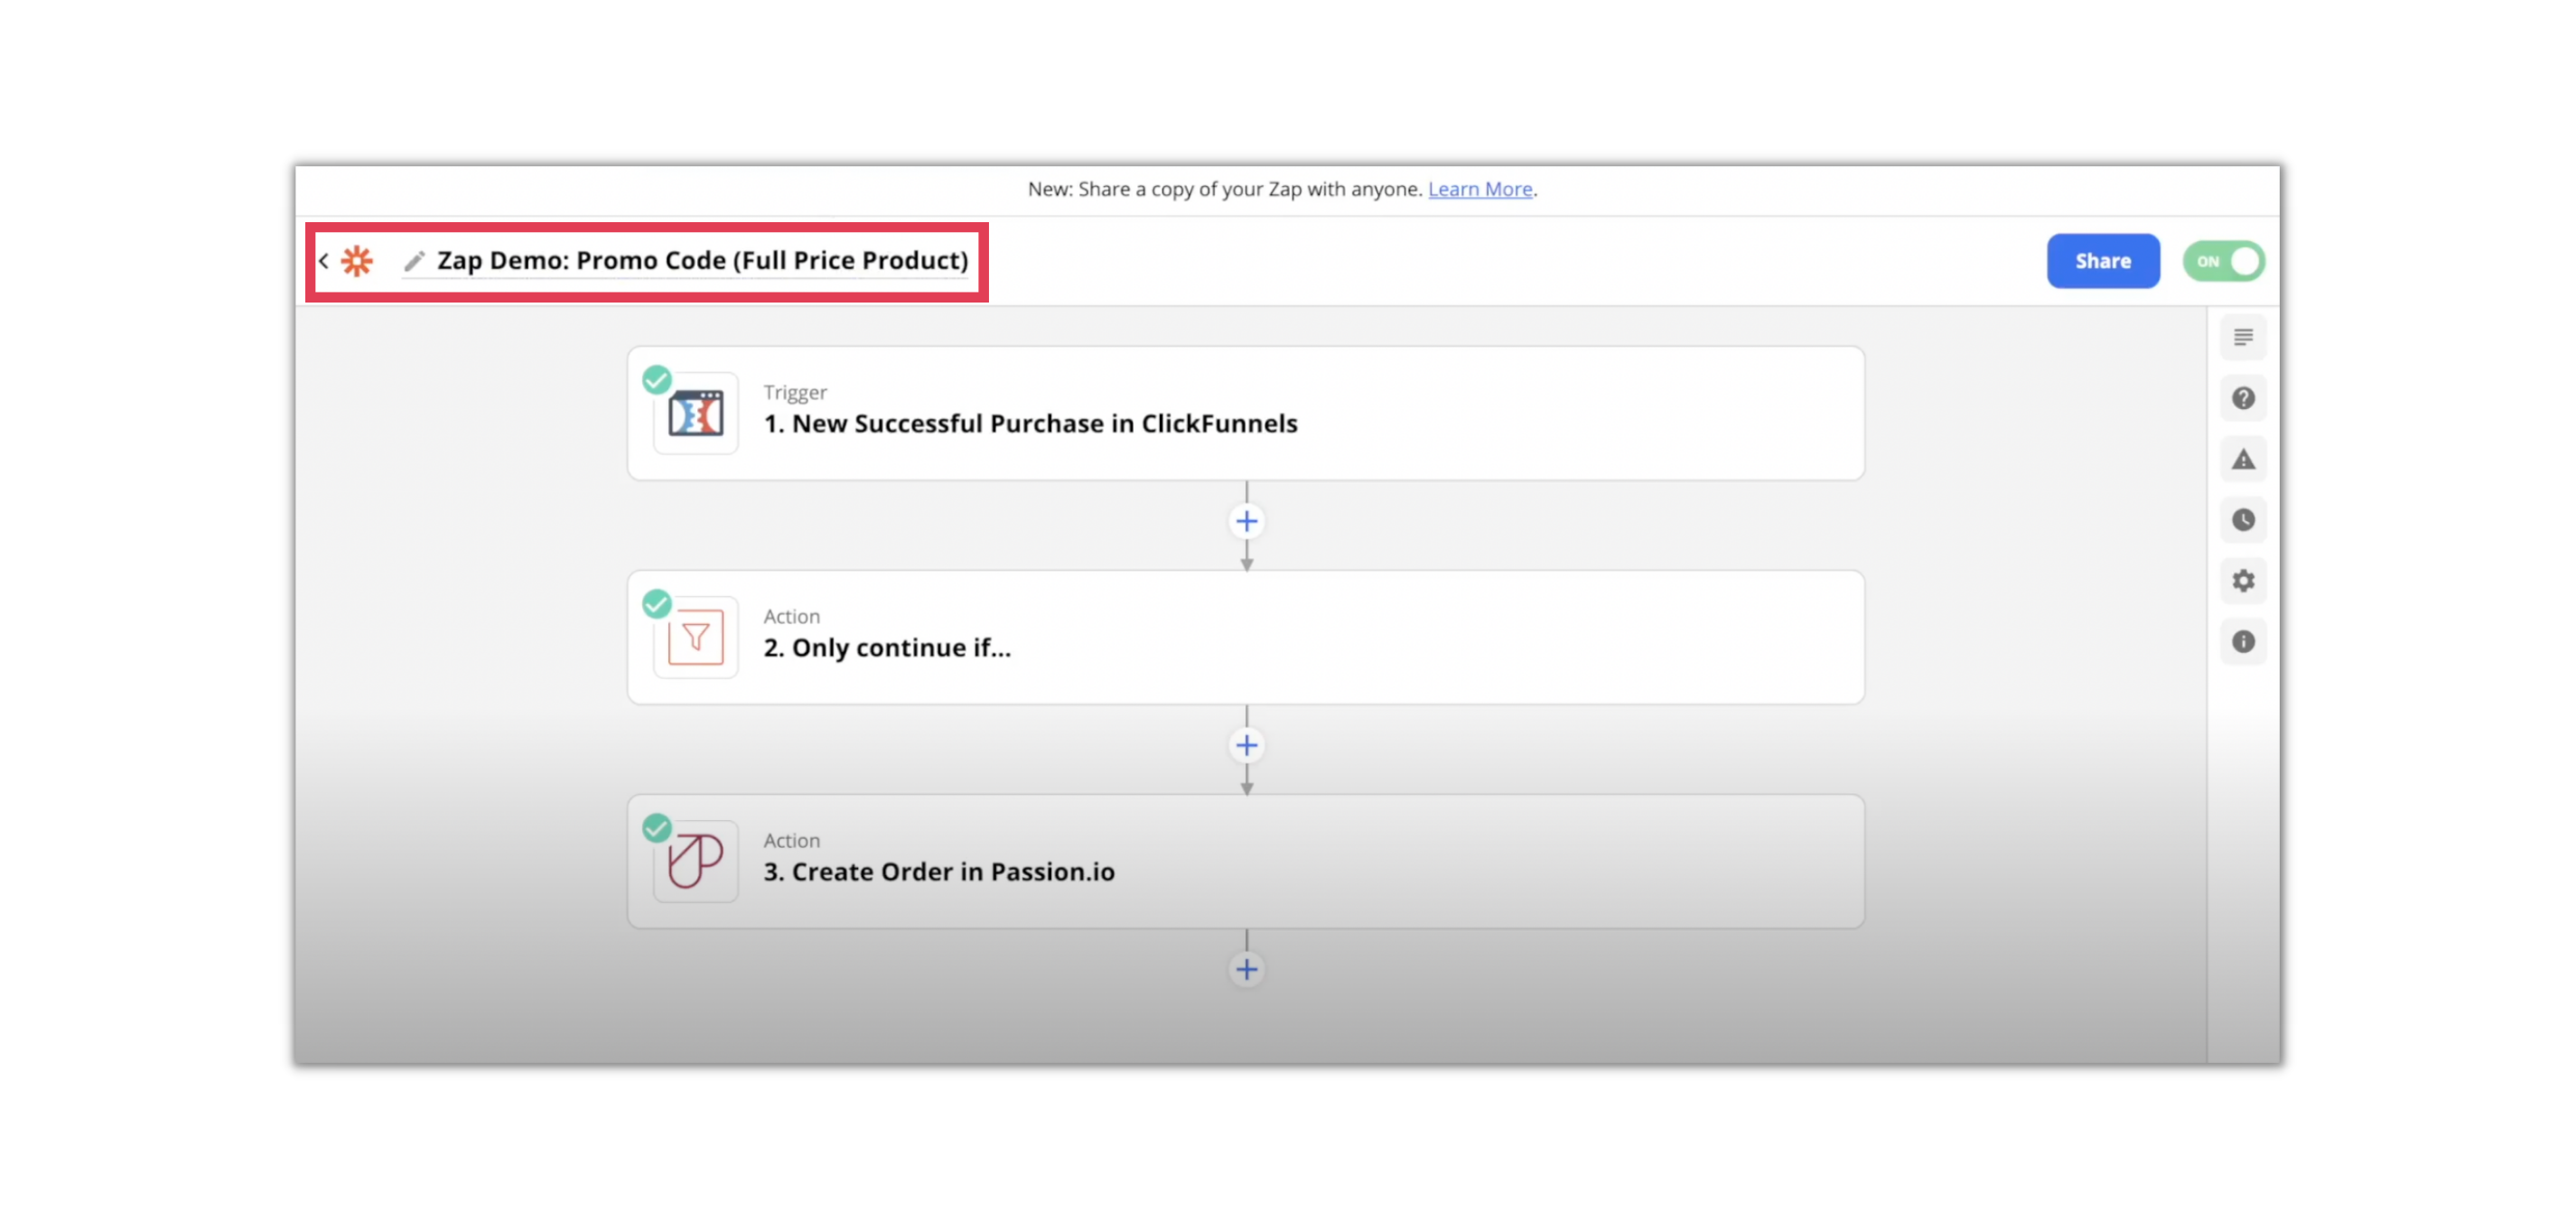
1. Create two separate zaps for both pricing plans
- Zap for Full Price Product:
- Zap for Discounted Product:
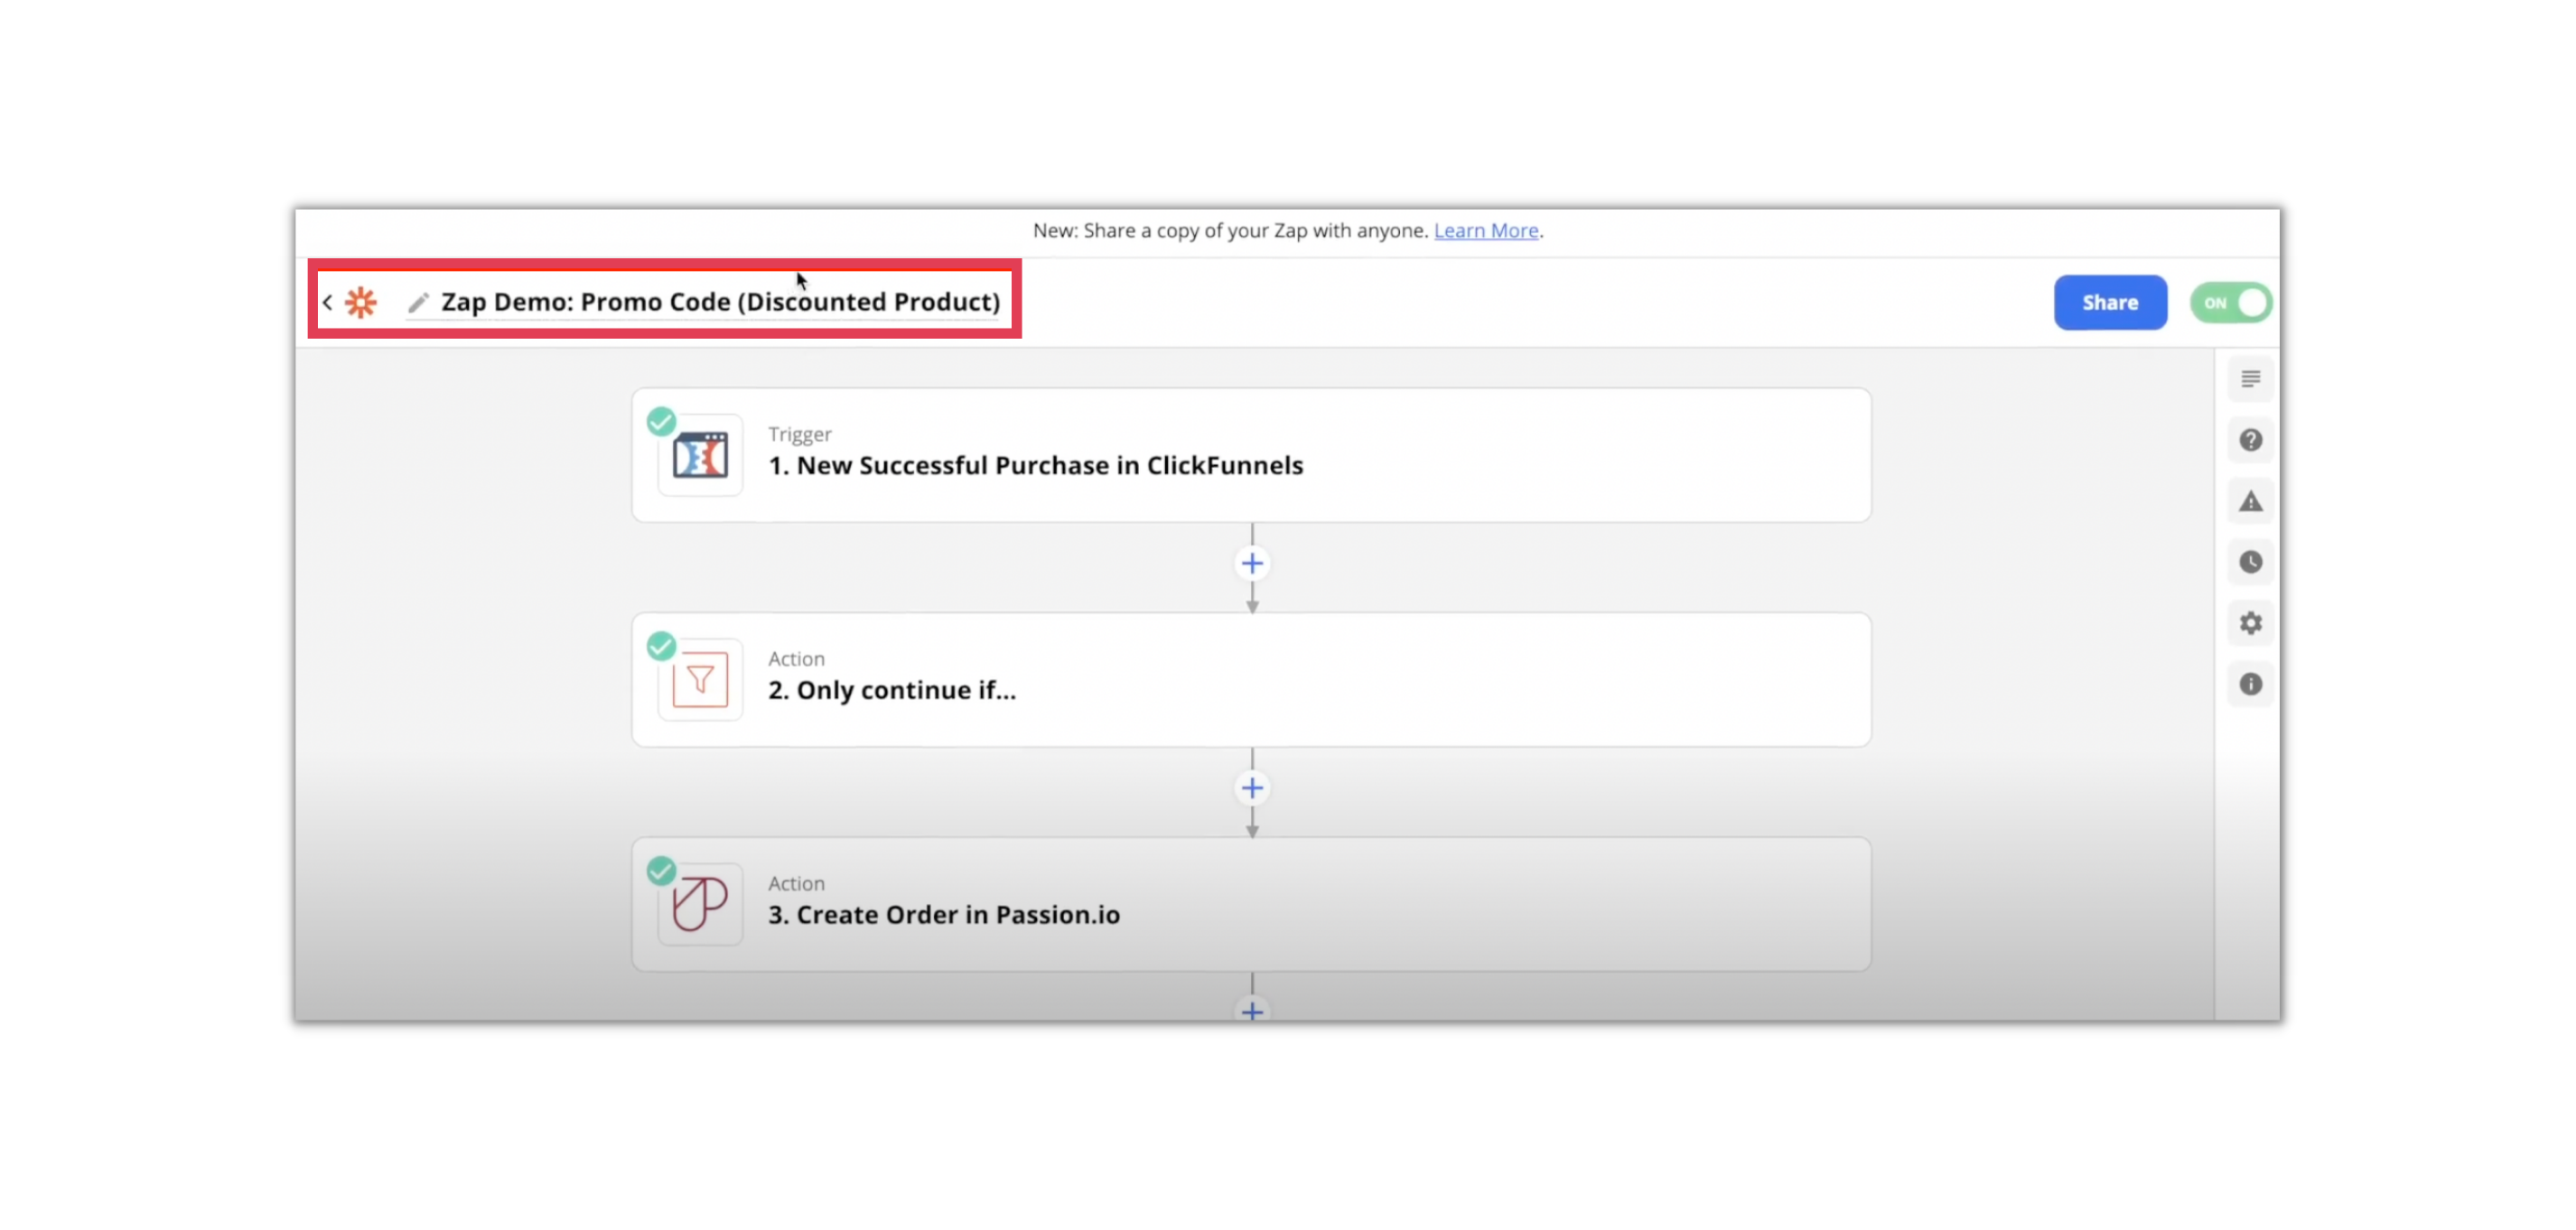
2. Set up the trigger and select the following:
- Choose app & event: ClickFunnels
- Trigger Event: New Successful Purchase
- Choose account: ClickFunnels
- Set up Trigger: Funnel ID
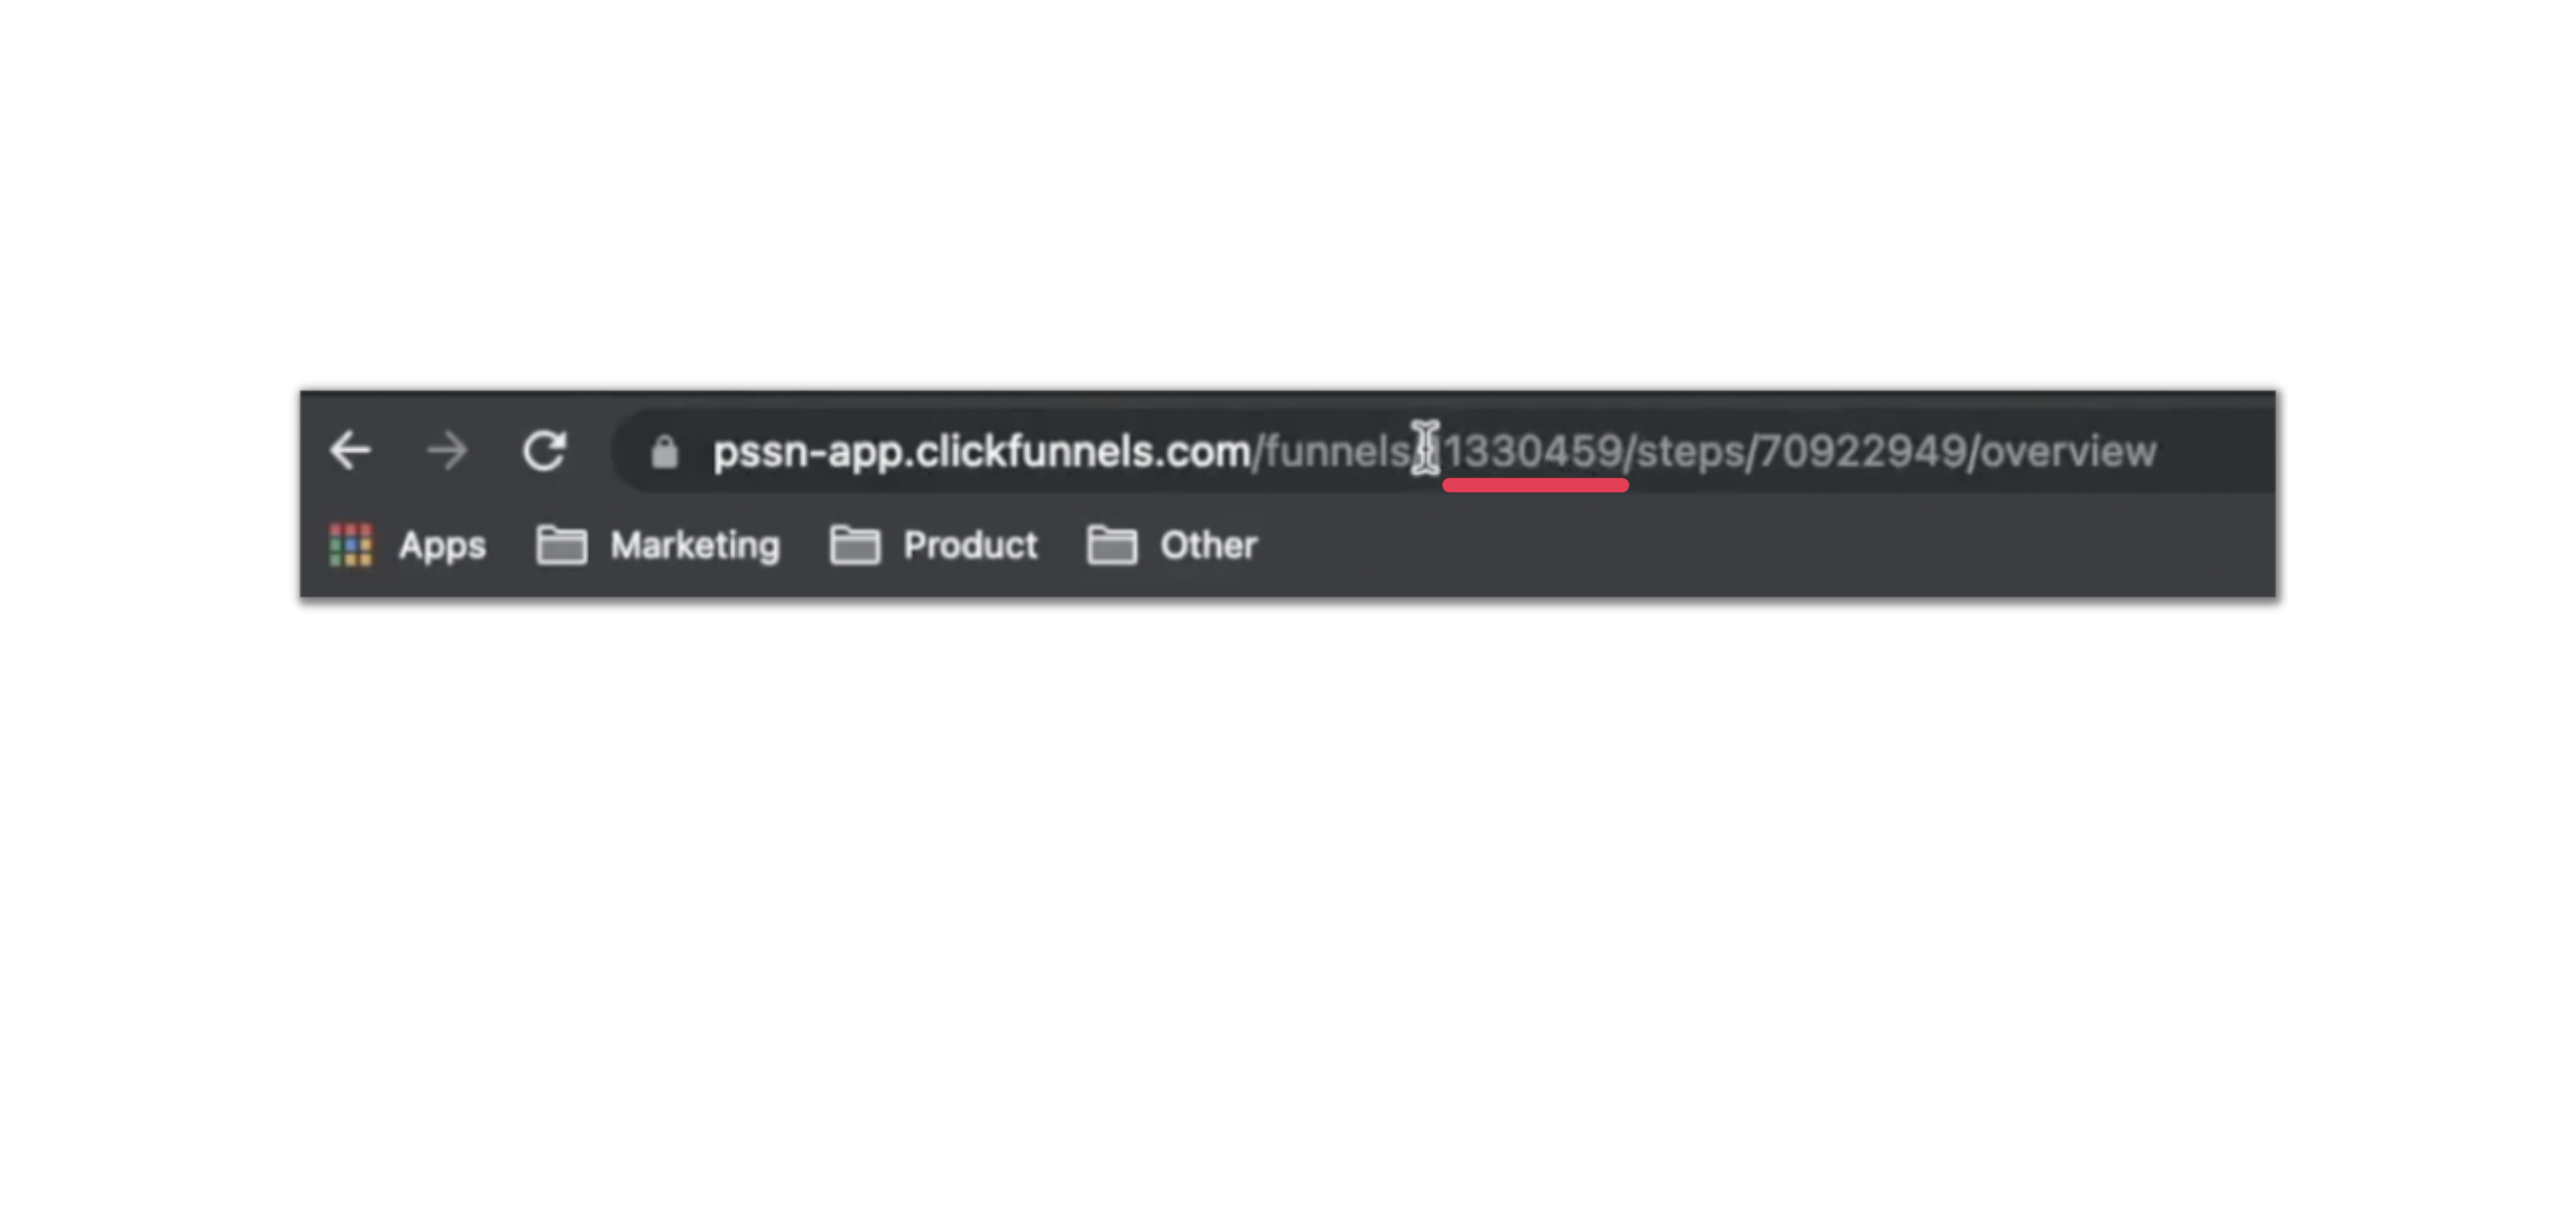
Note: To get your funnel ID, copy the digits after the word funnels/ from the ClickFunnels URL
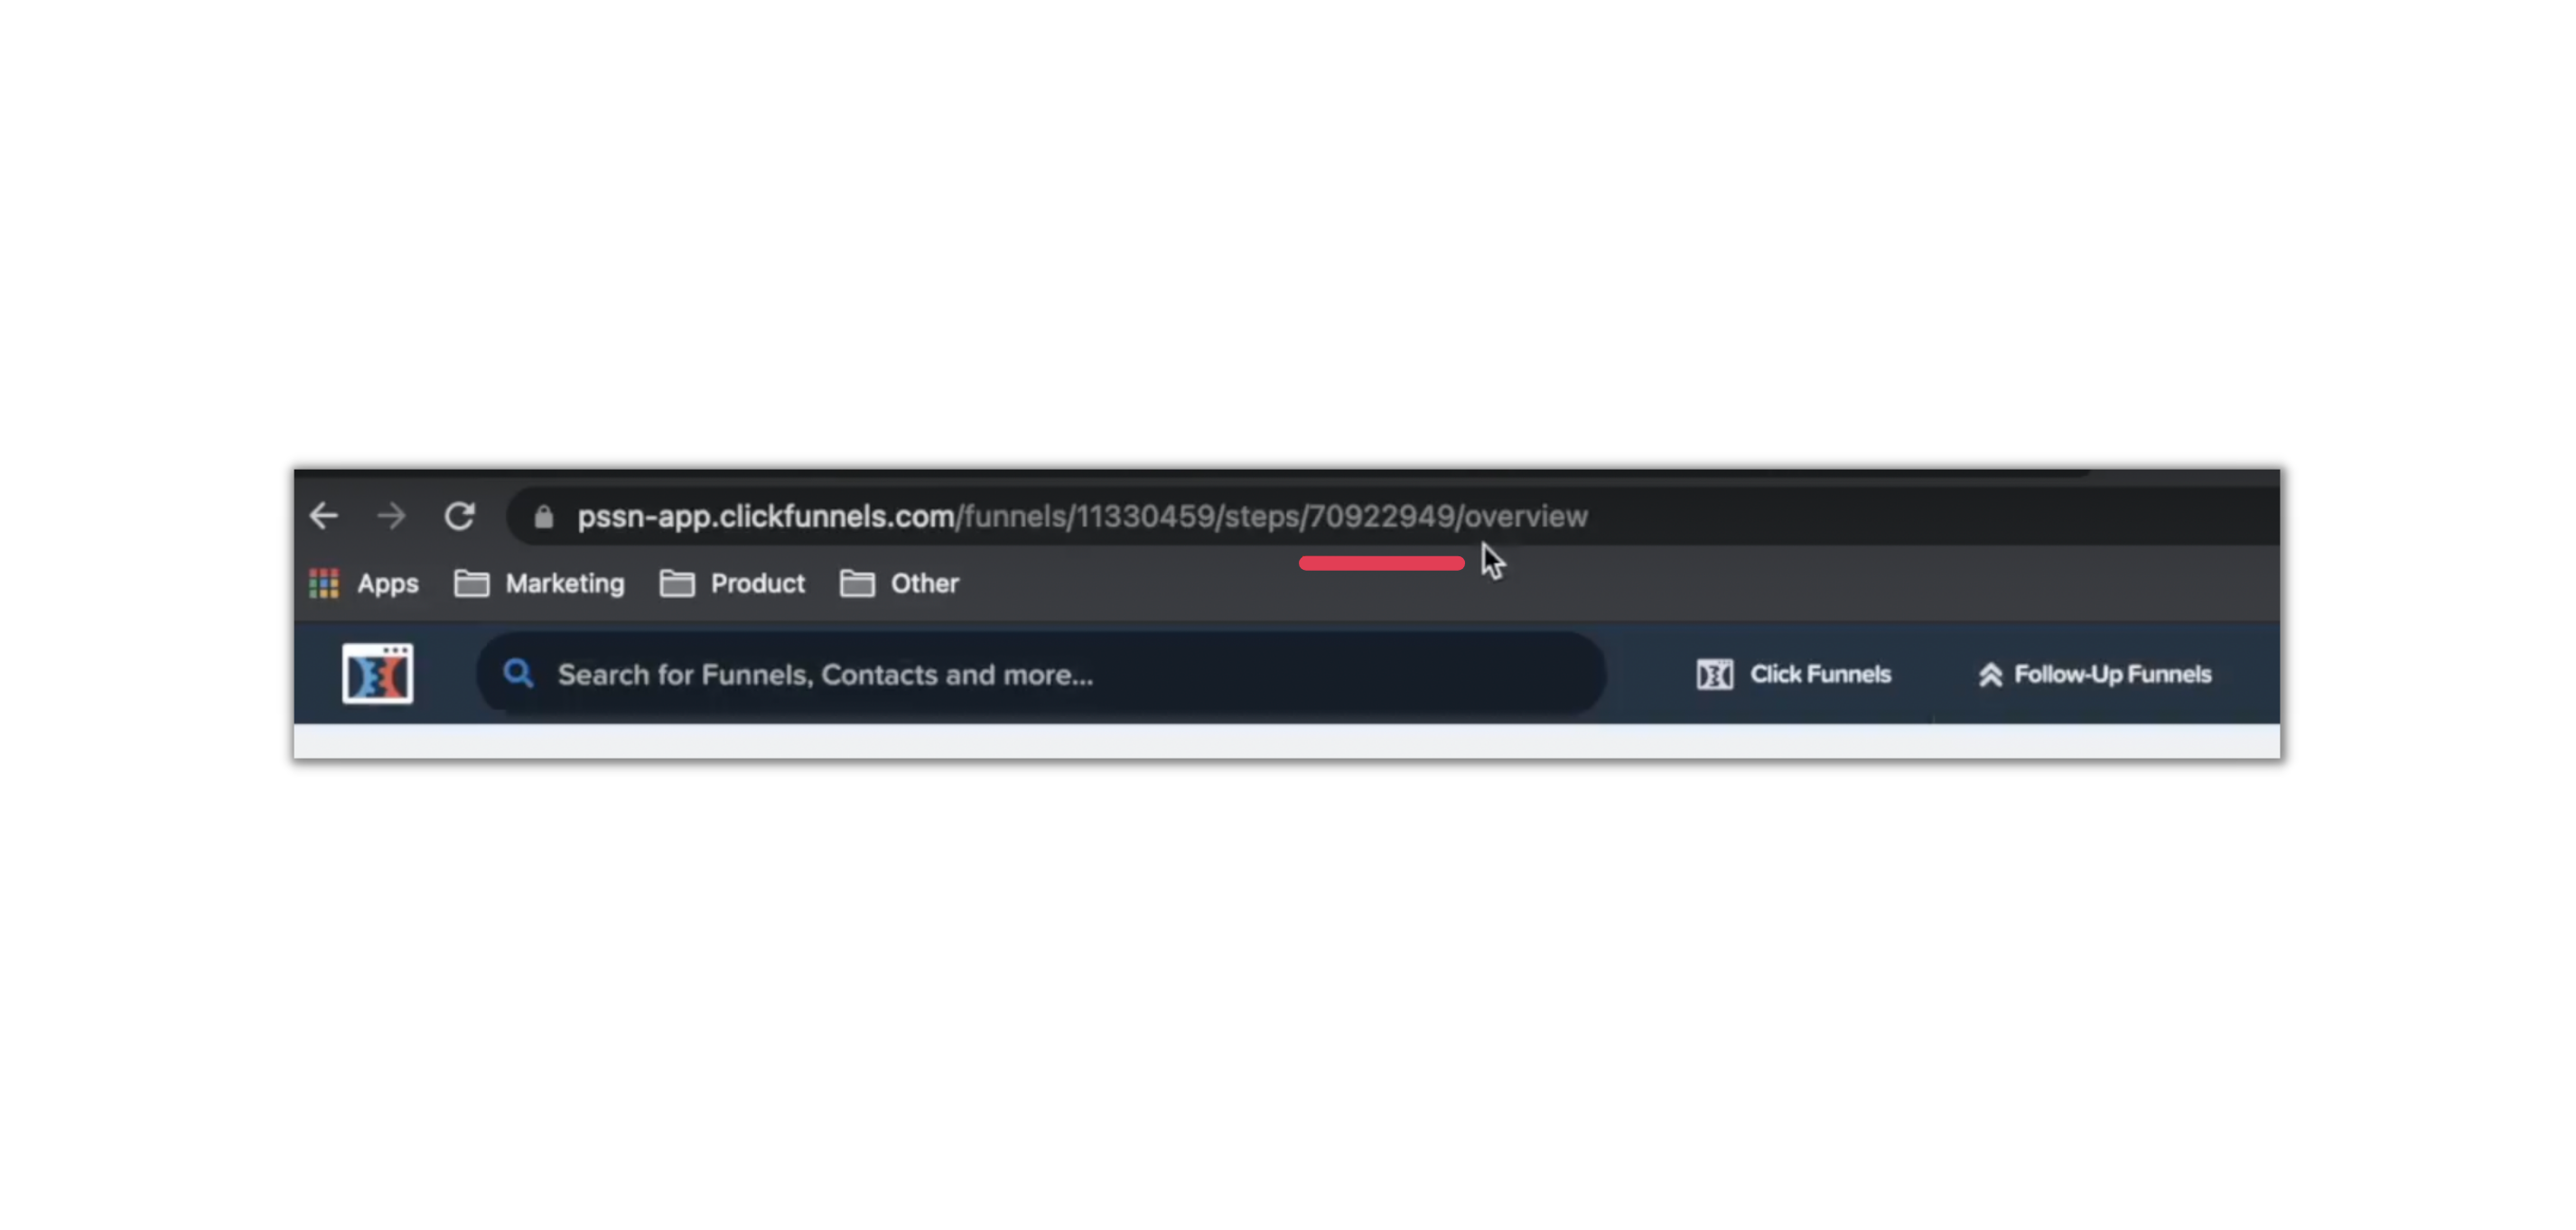
Select your funnel step. If you can't find it in the list, copy the digits after the word steps/ from the ClickFunnels URL
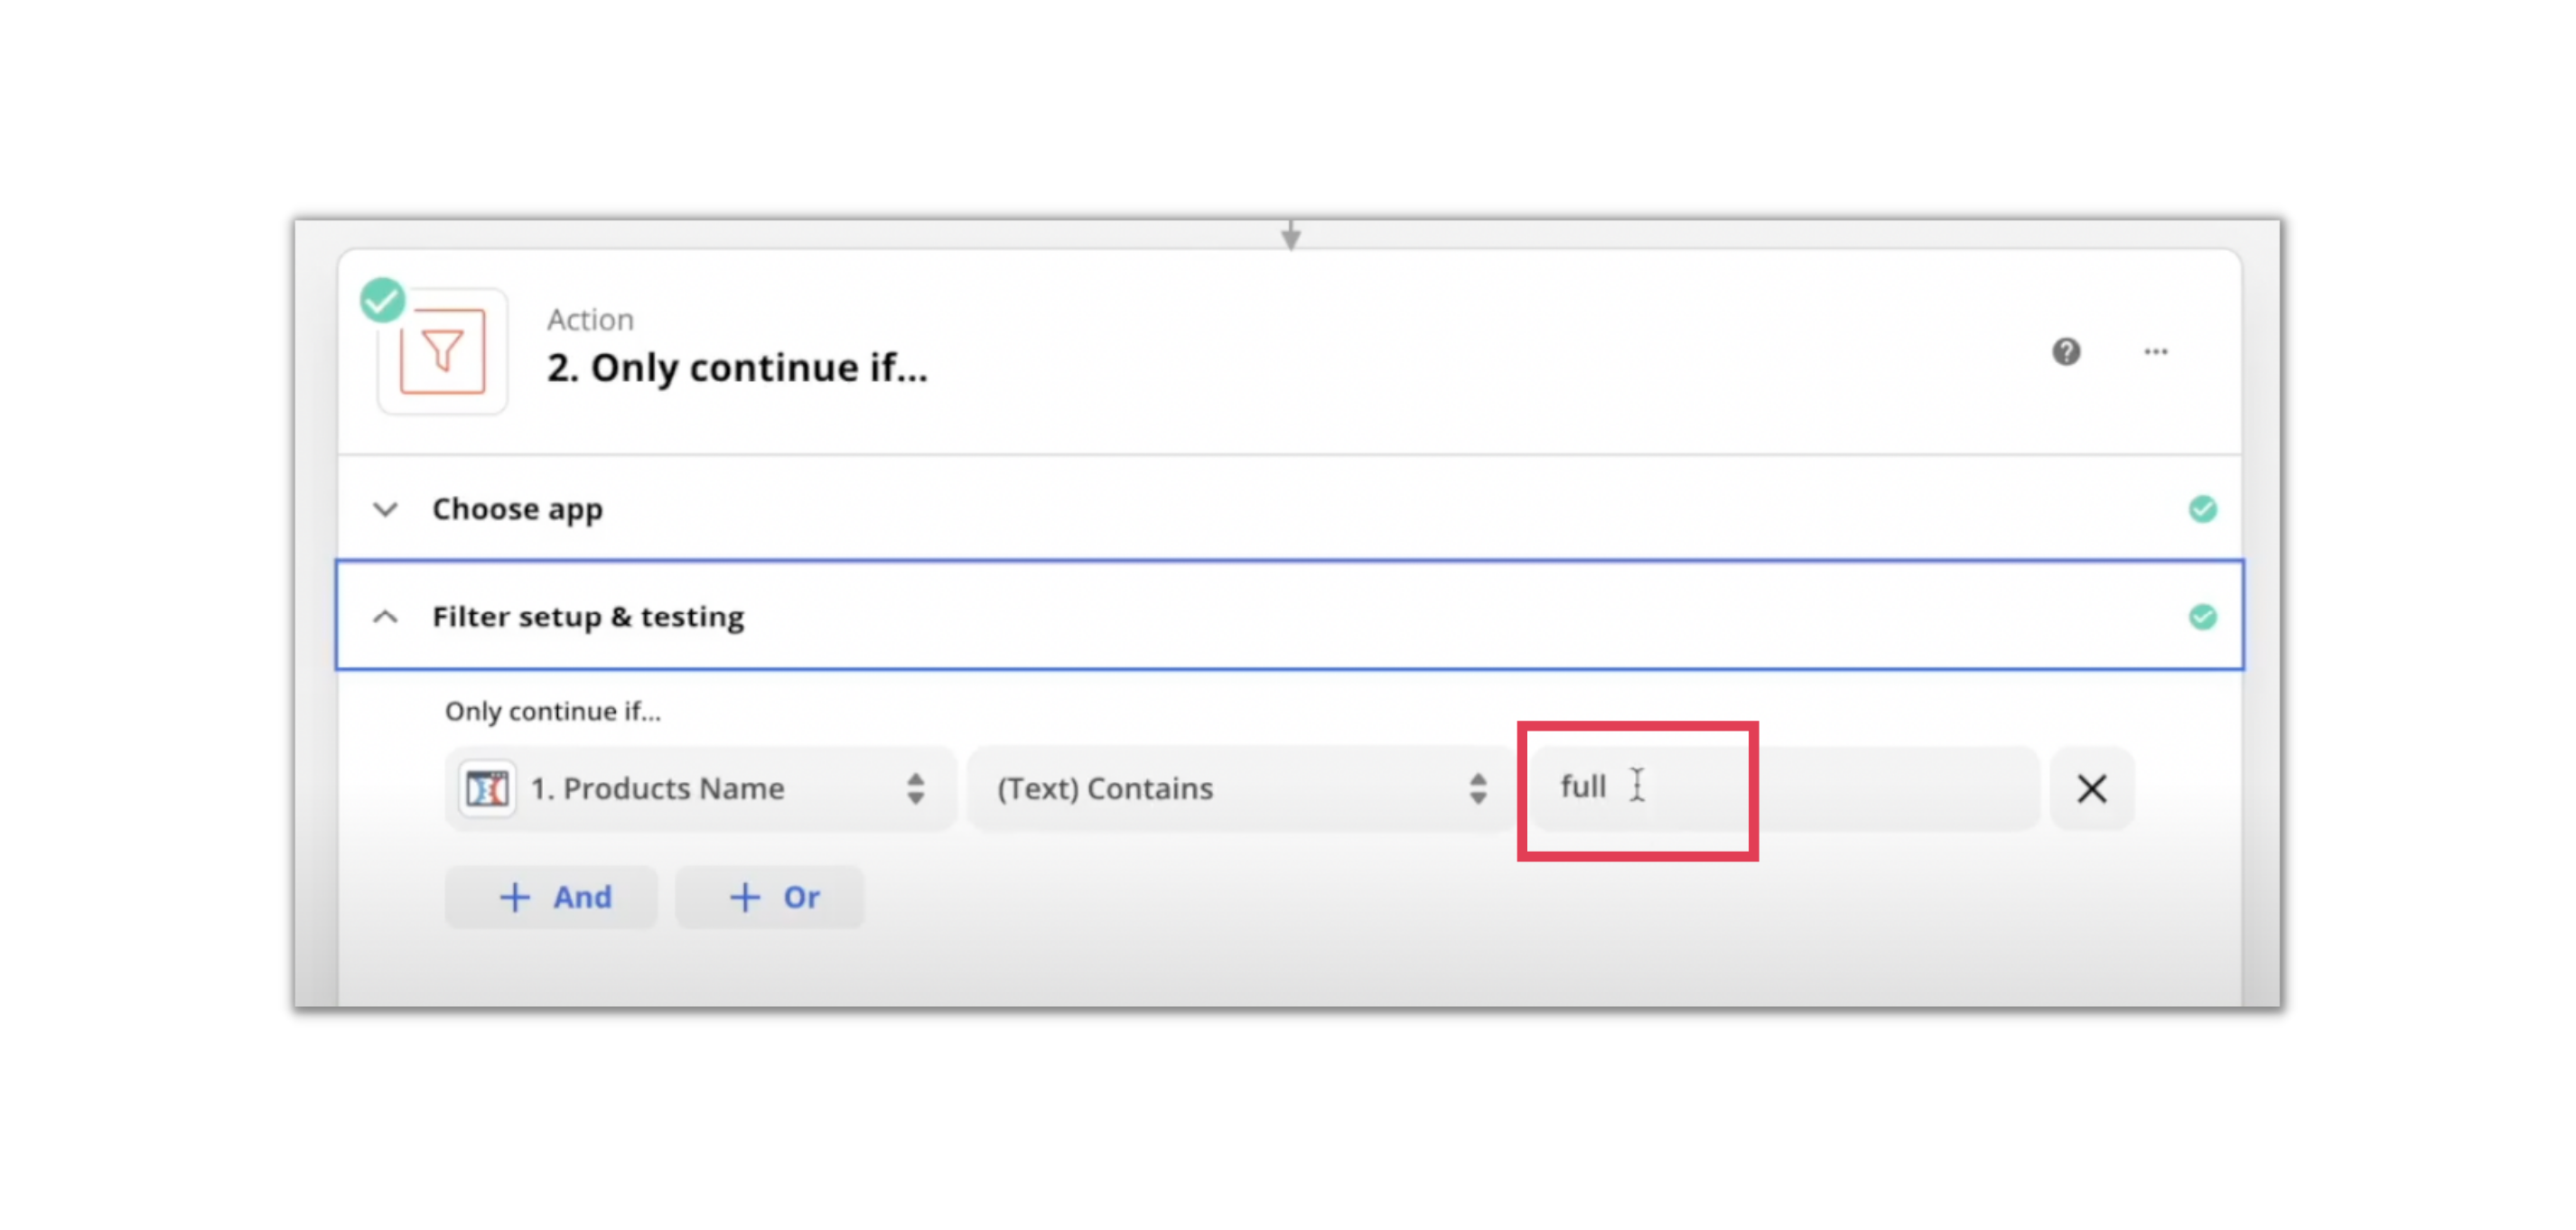
2.1 Set up the filter:
Under Filter setup & testing, type in the word “full” so the zap will only continue if the word is detected
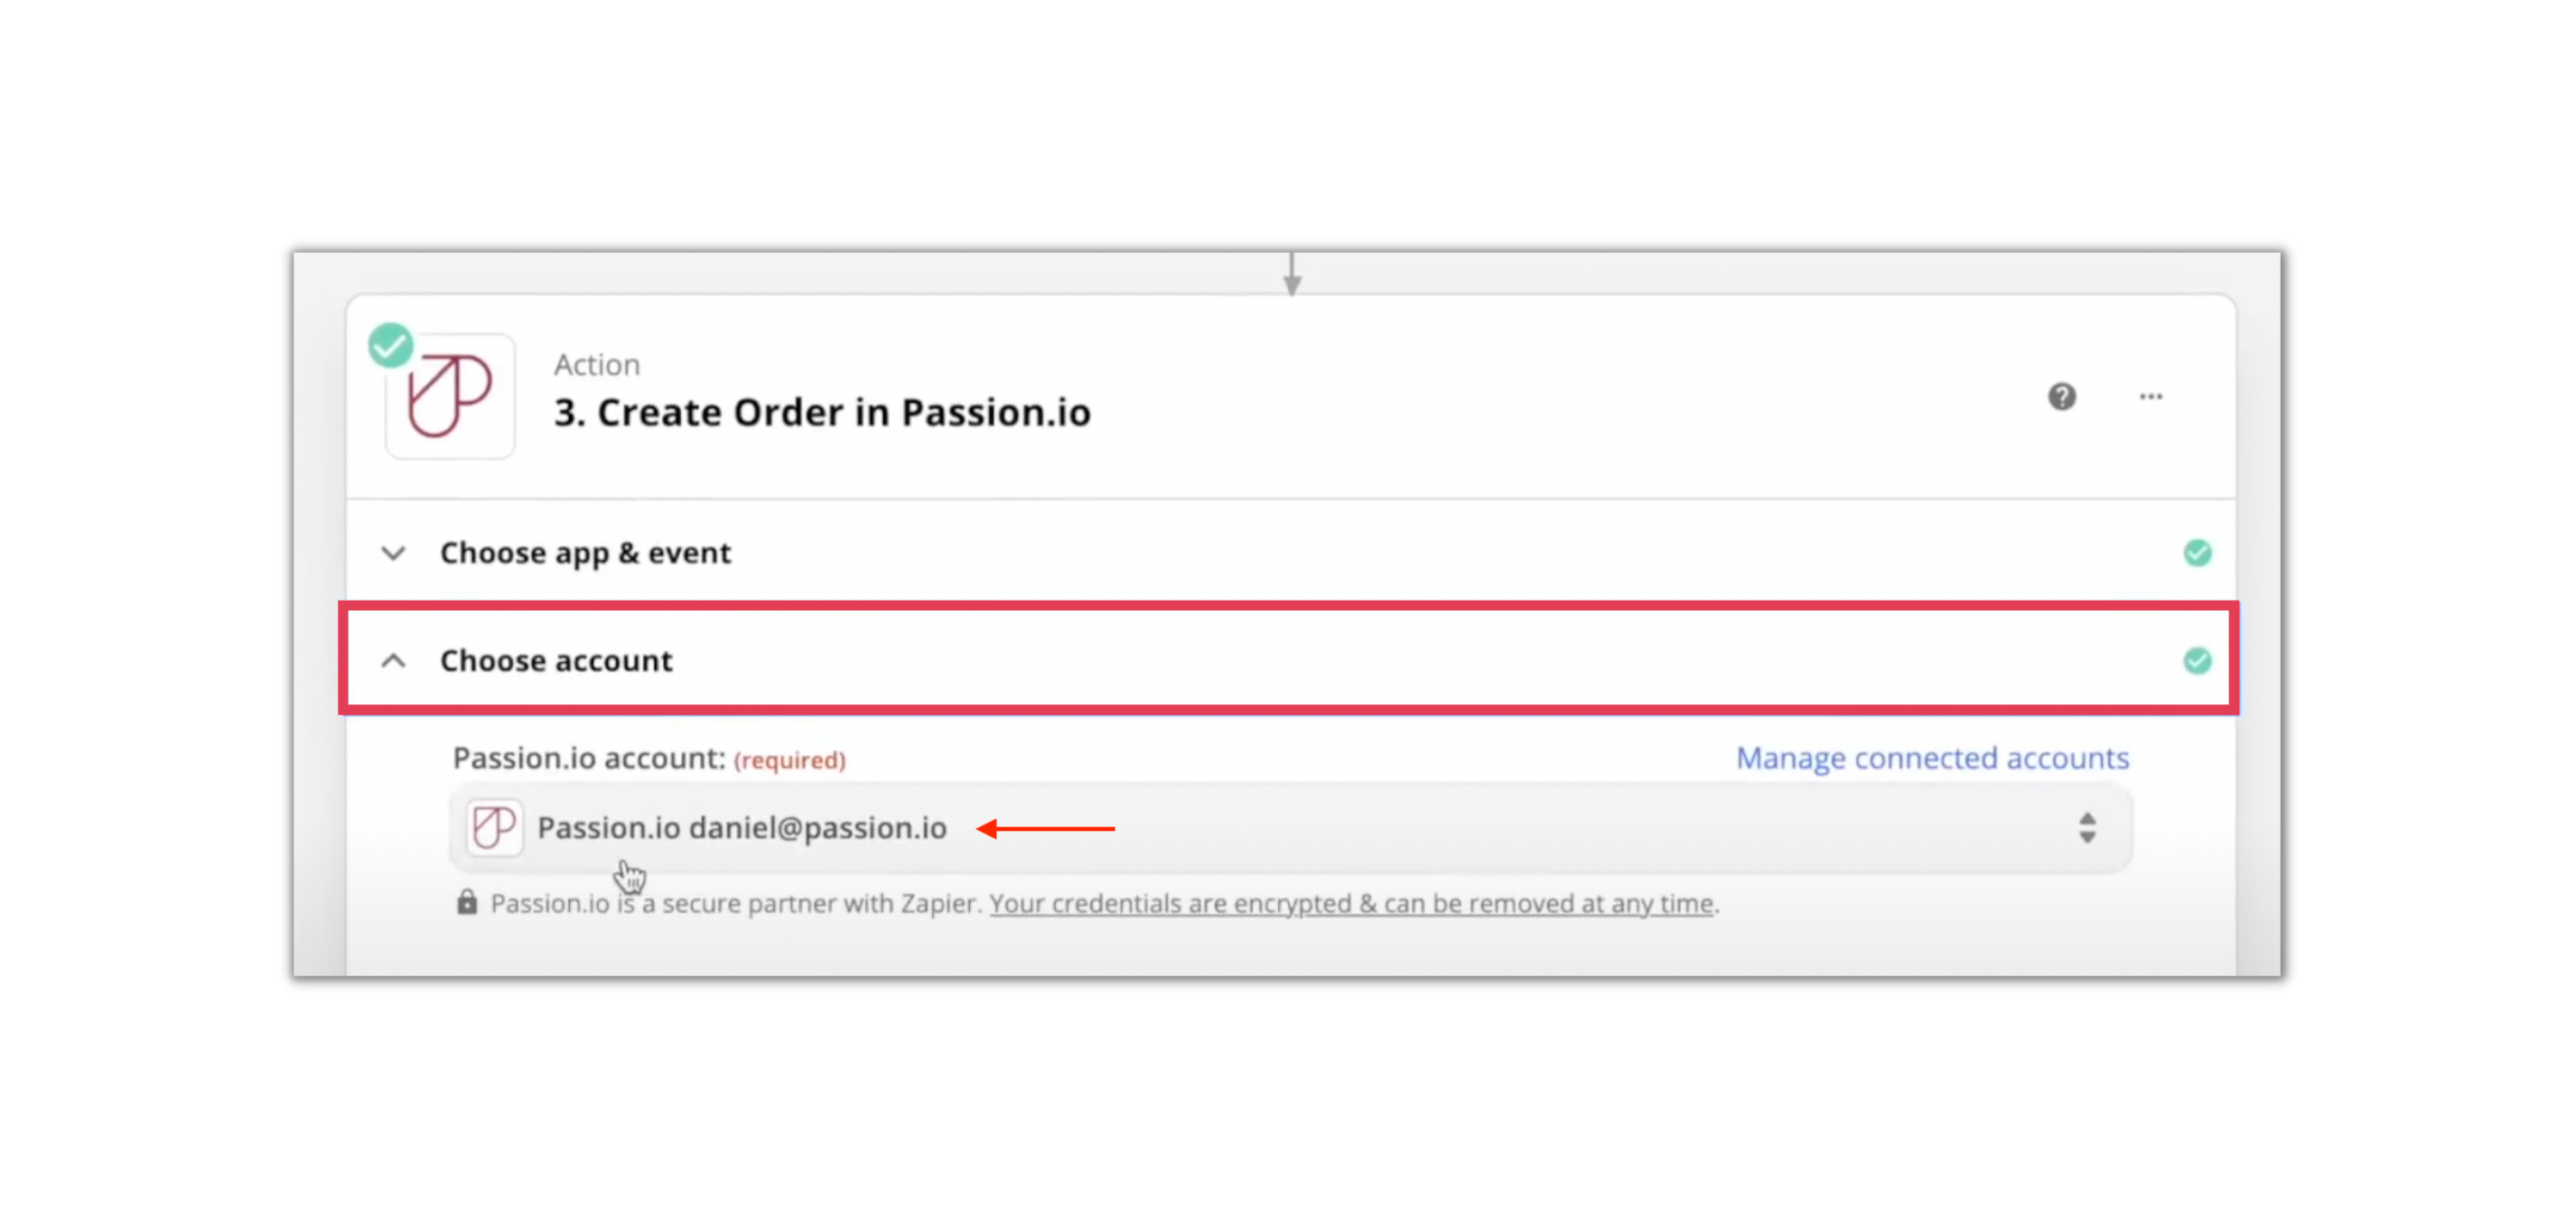
2.2 Connect to Passion.io, choose your account, and type in your client email address and password
2.3 Fill out the required fields: email address, first name, last name, country, plan ID, and amount
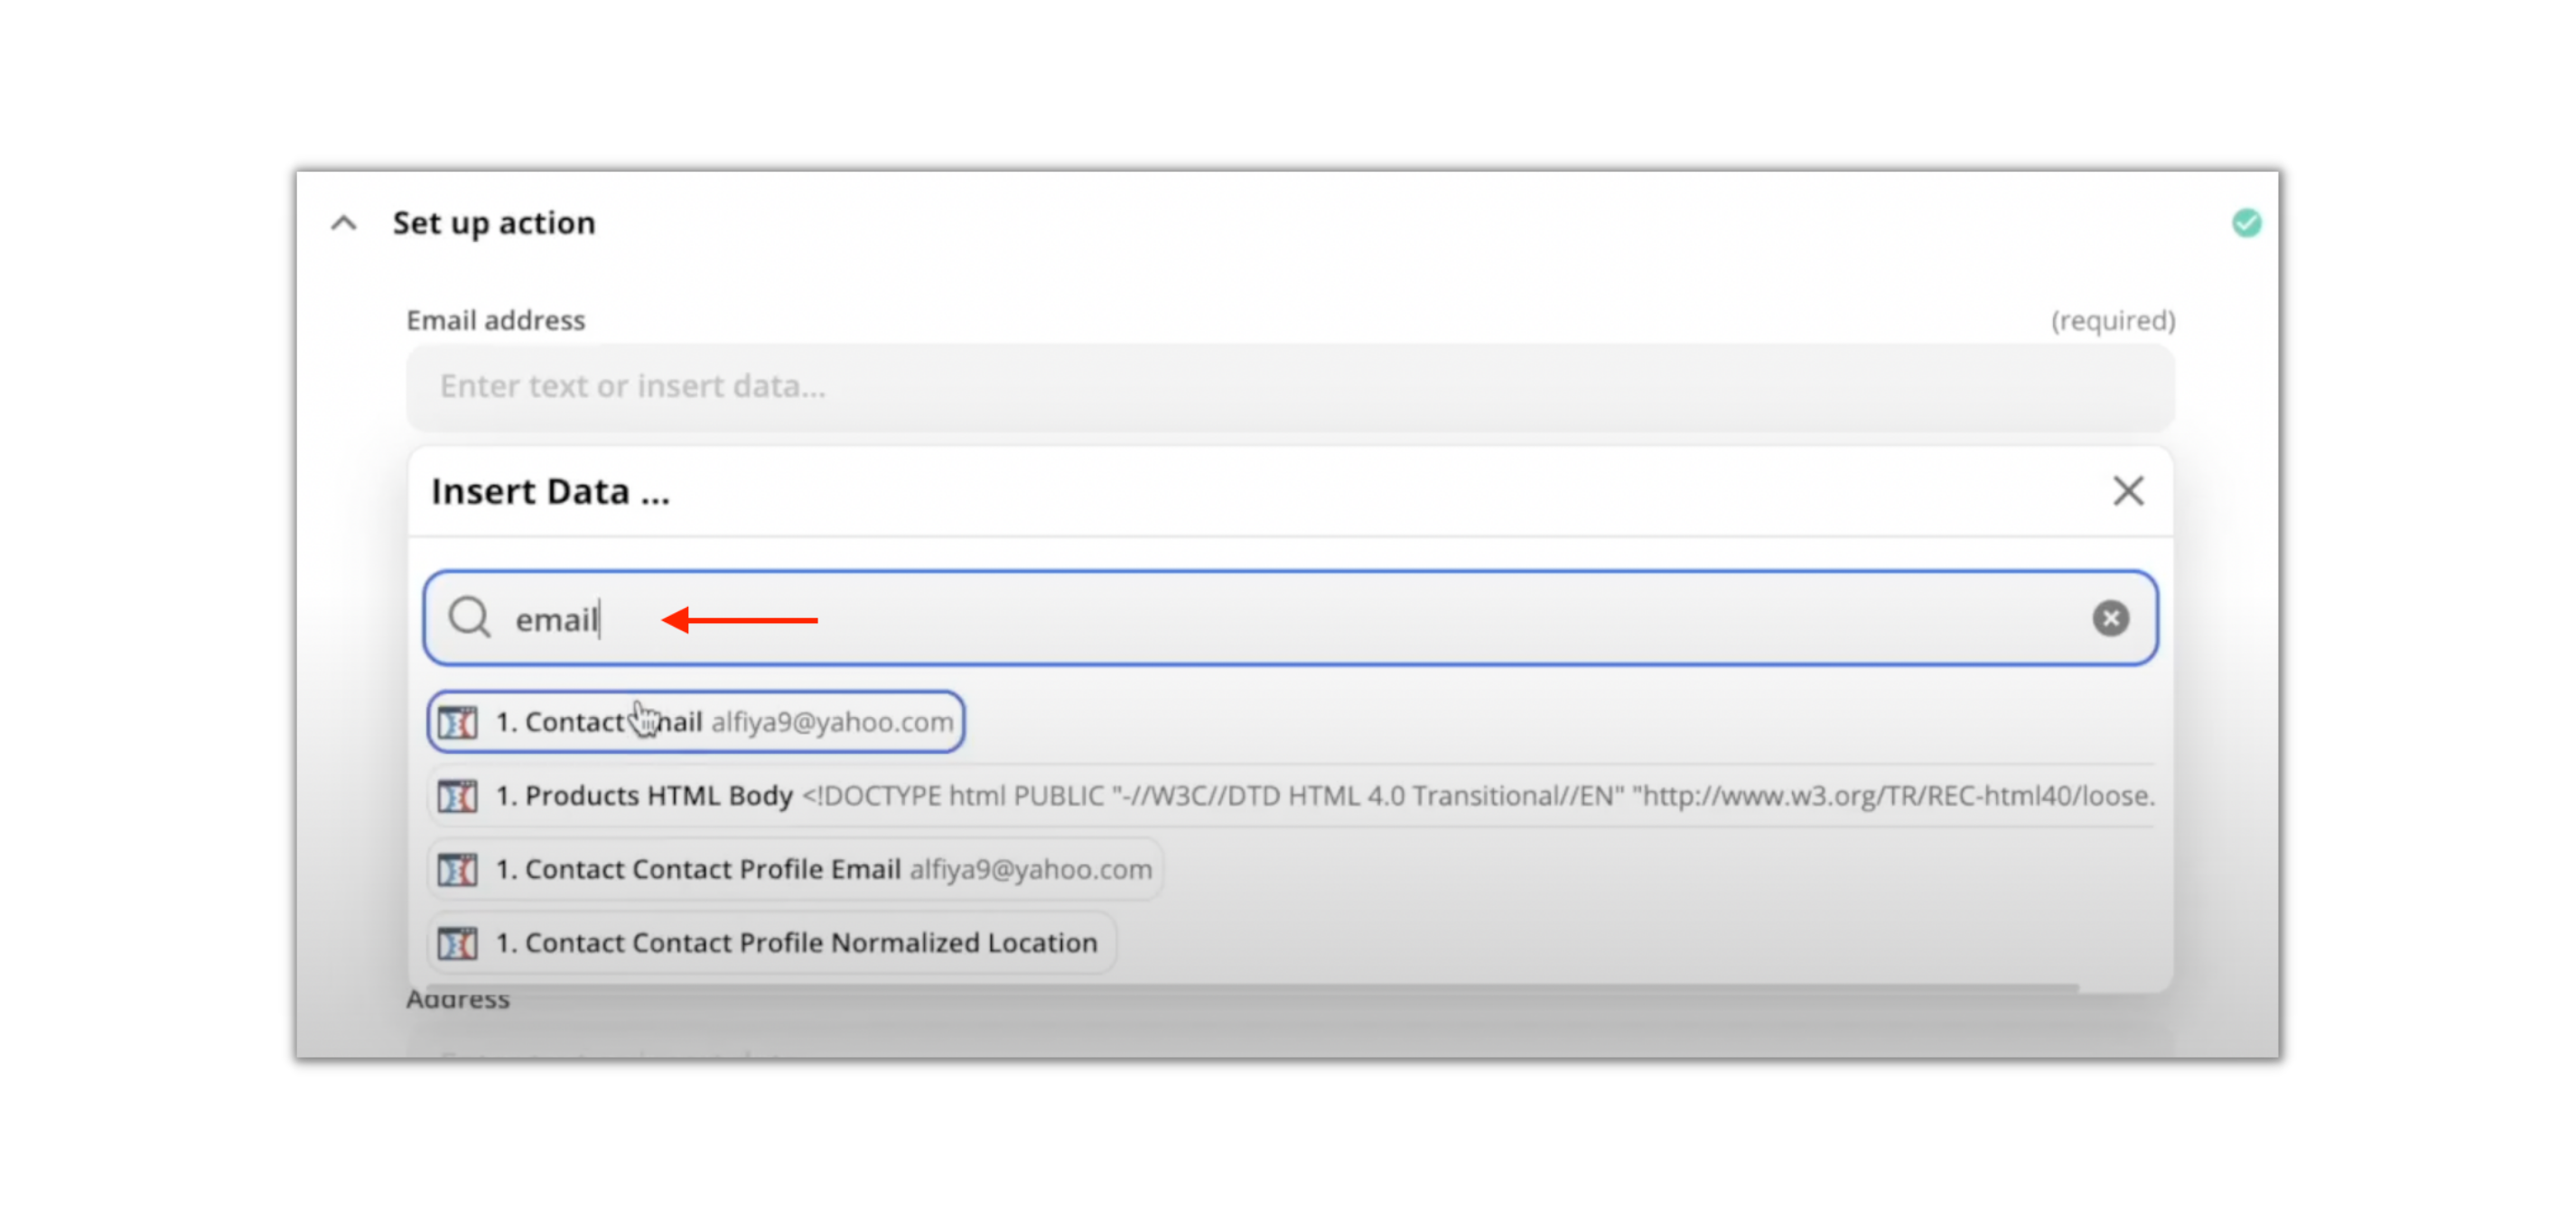
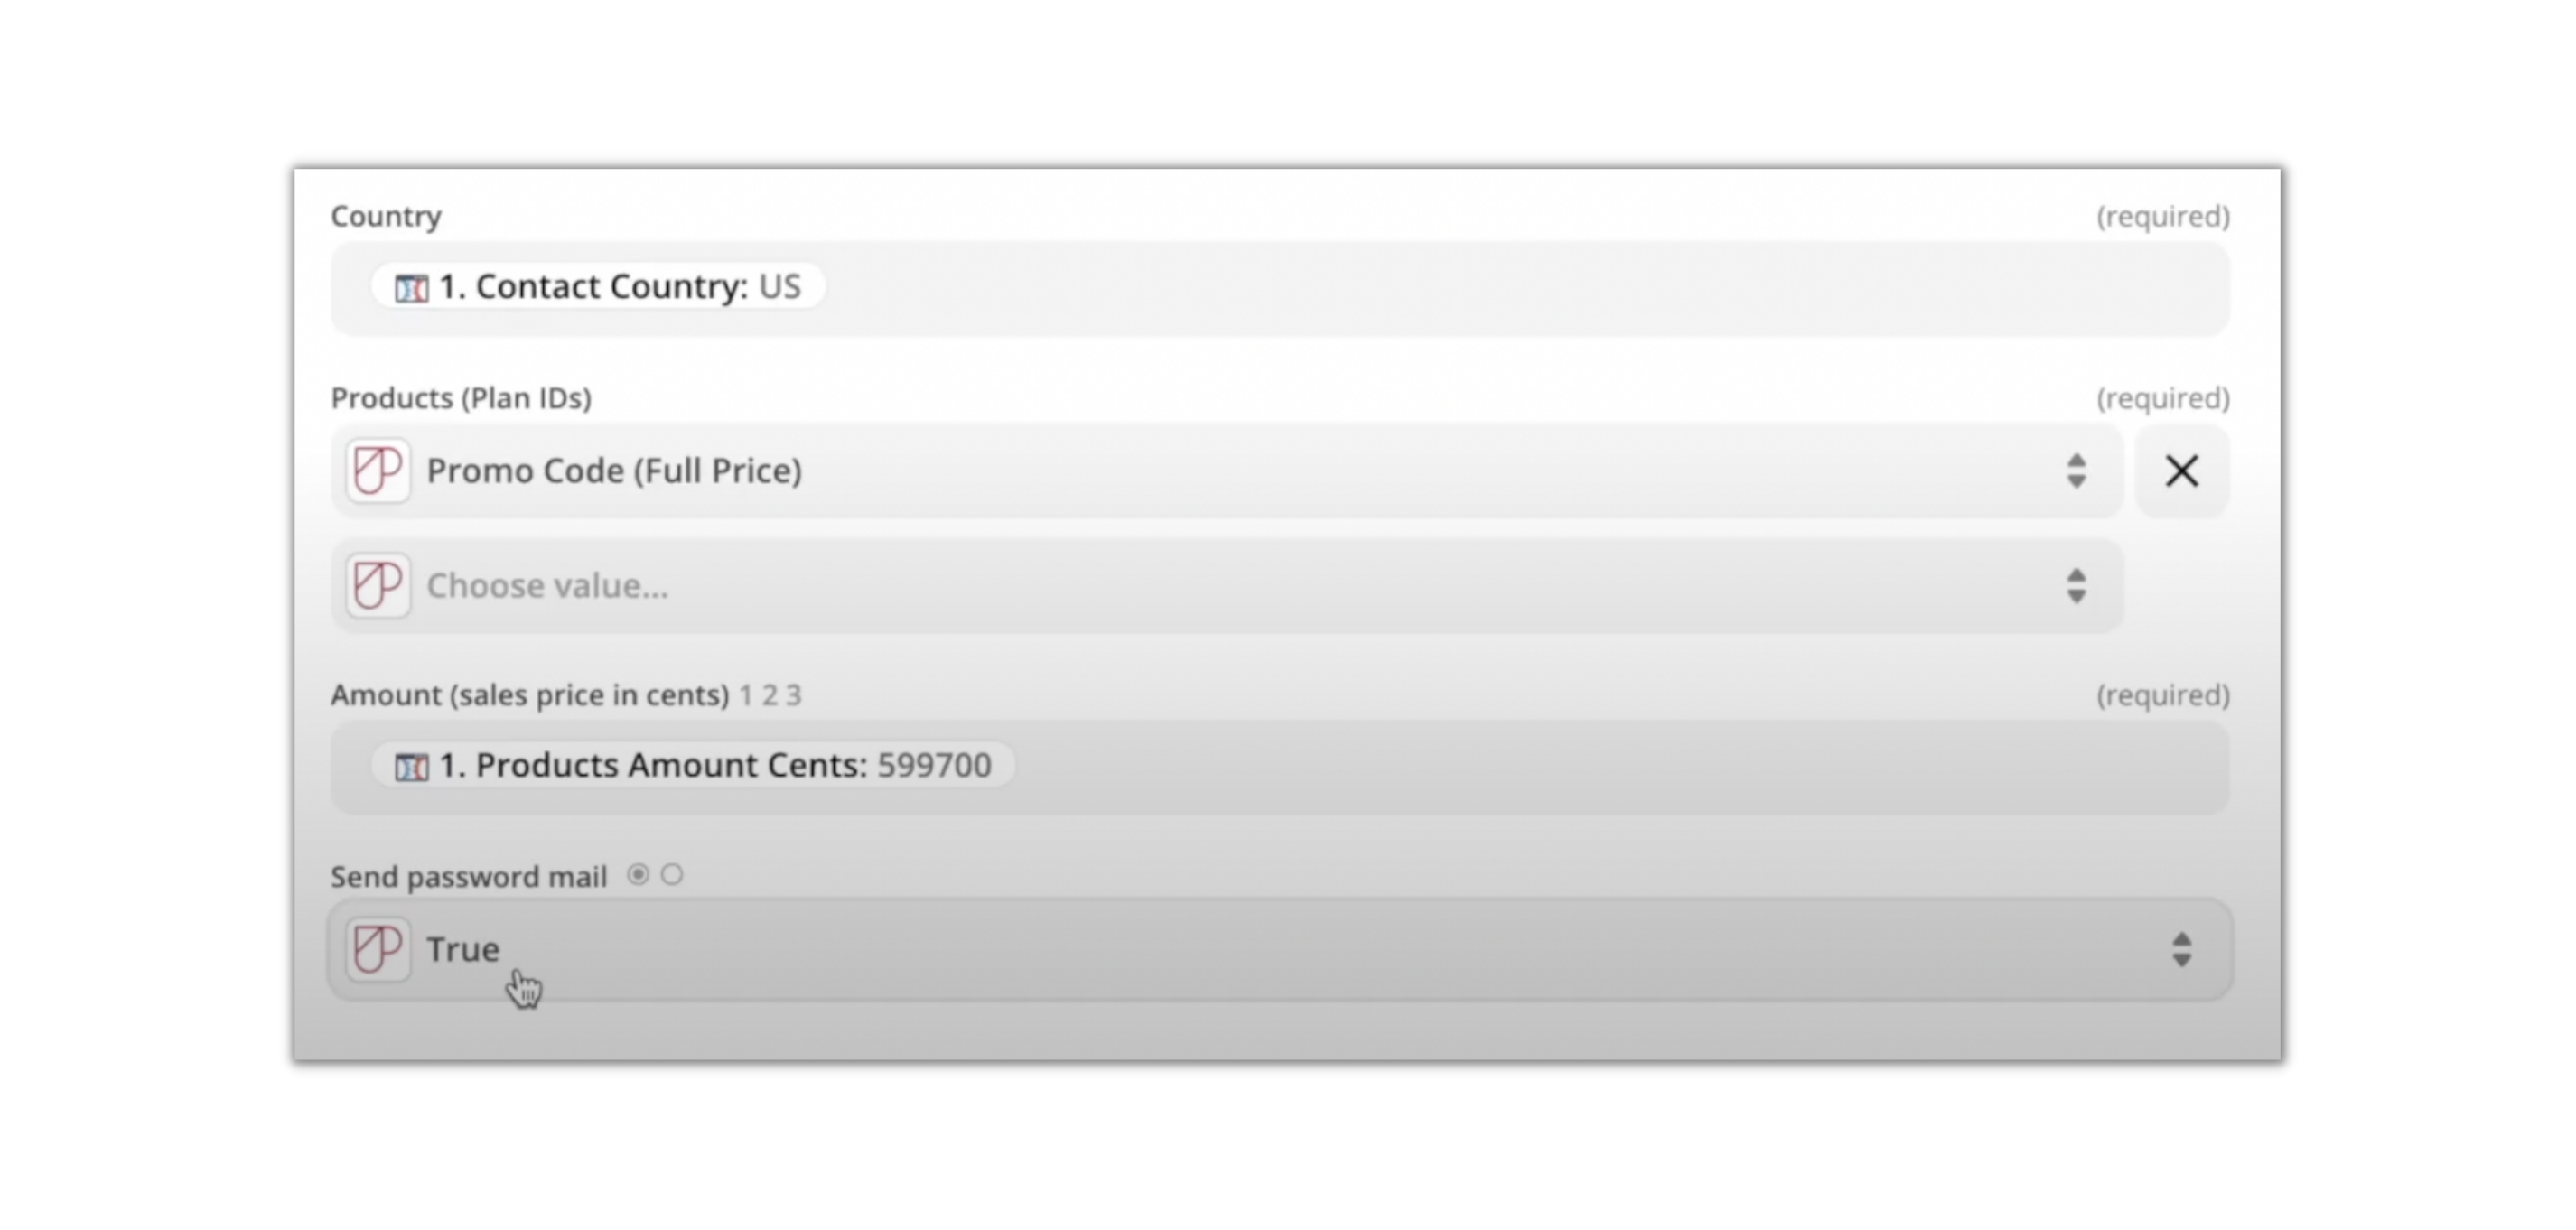
Make sure that the sales price (in cents) matches what’s in your Plan ID.
For the Send password mail, select True so clients who purchased the product will get a password reset email to access the product
3. Test the action and switch on your zap
4. Do the same thing with the other zap (for the discounted) but change the filter and the product connected to the discounted plan
5. Do a test purchase. Afterward, go to your App Builder, and then Metrics and check if the test email address was added.
3. Frequently Asked Questions (FAQs)
- My zap is not being triggered. What should I do?
Follow this article: Zap isn't being triggered
- I am experiencing an issue with my ClickFunnels. What should I do?
You can check ClickFunnels Troubleshooting articles here.