.png?width=185&height=50&name=Full%20Passion.io%20logo%20(white).png)
Do you want to give your audience a discount?
Or do you want to attract more new subscribers?
In this article, you will learn how to do that with Zapier.
IN THIS ARTICLE
1. How to set up on Passion (step1)
2. How to set up on Zapier (step 2)
Didn't connect your Zapier account with Passion.io? Learn how.
1. How to set up on Passion
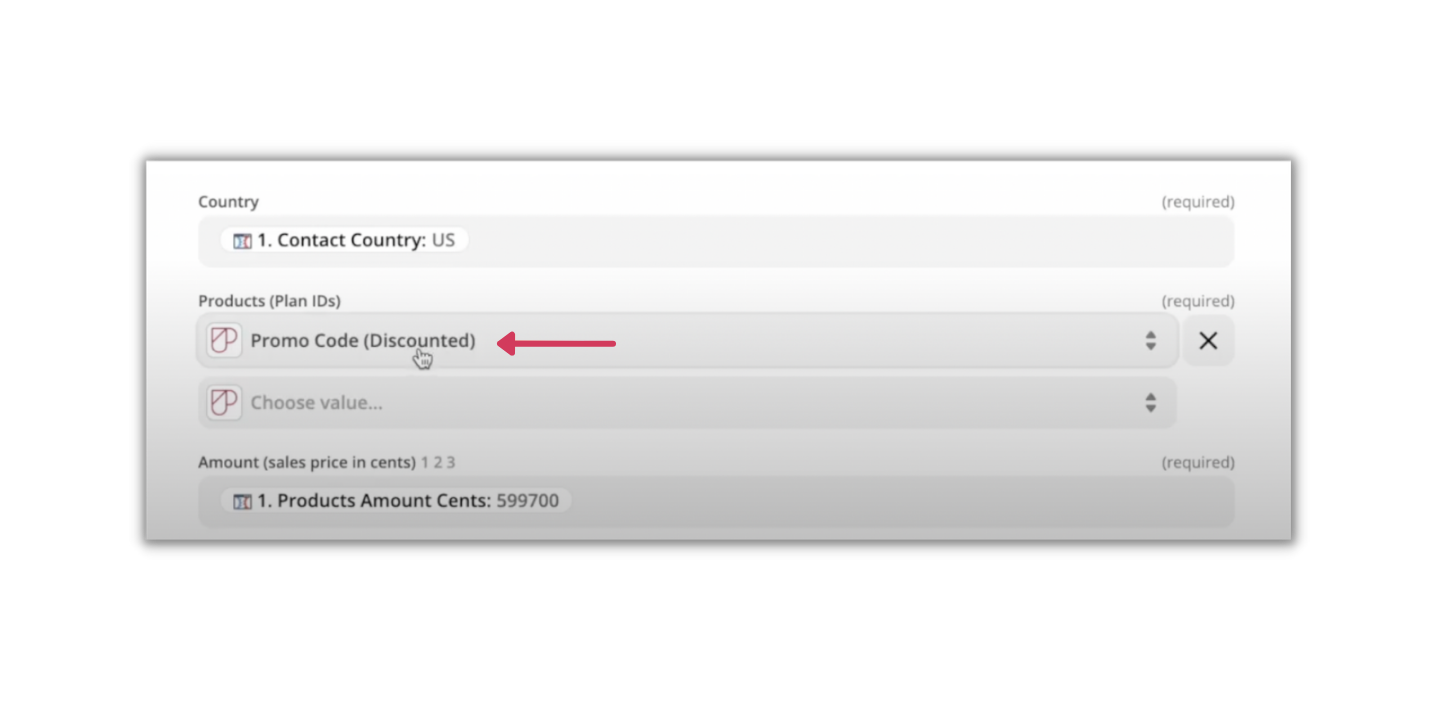
- Log in to your App Builder and create two pricing plans: Full-price and Discounted.
Don't know how to create a Pricing Plan? Learn how from here.
2. How to set up Zapier (step 2)
- Create two separate Zaps for both pricing plans
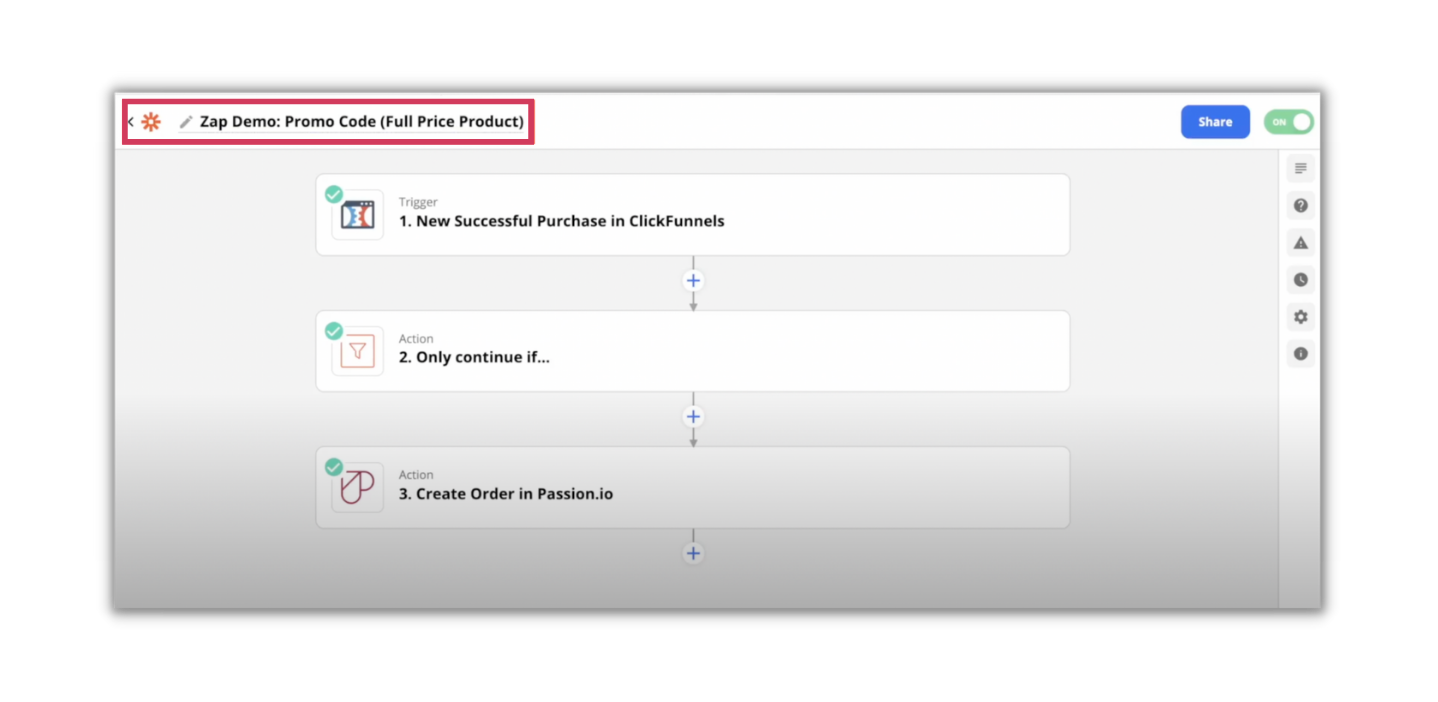
- Zap for Full Price Product:
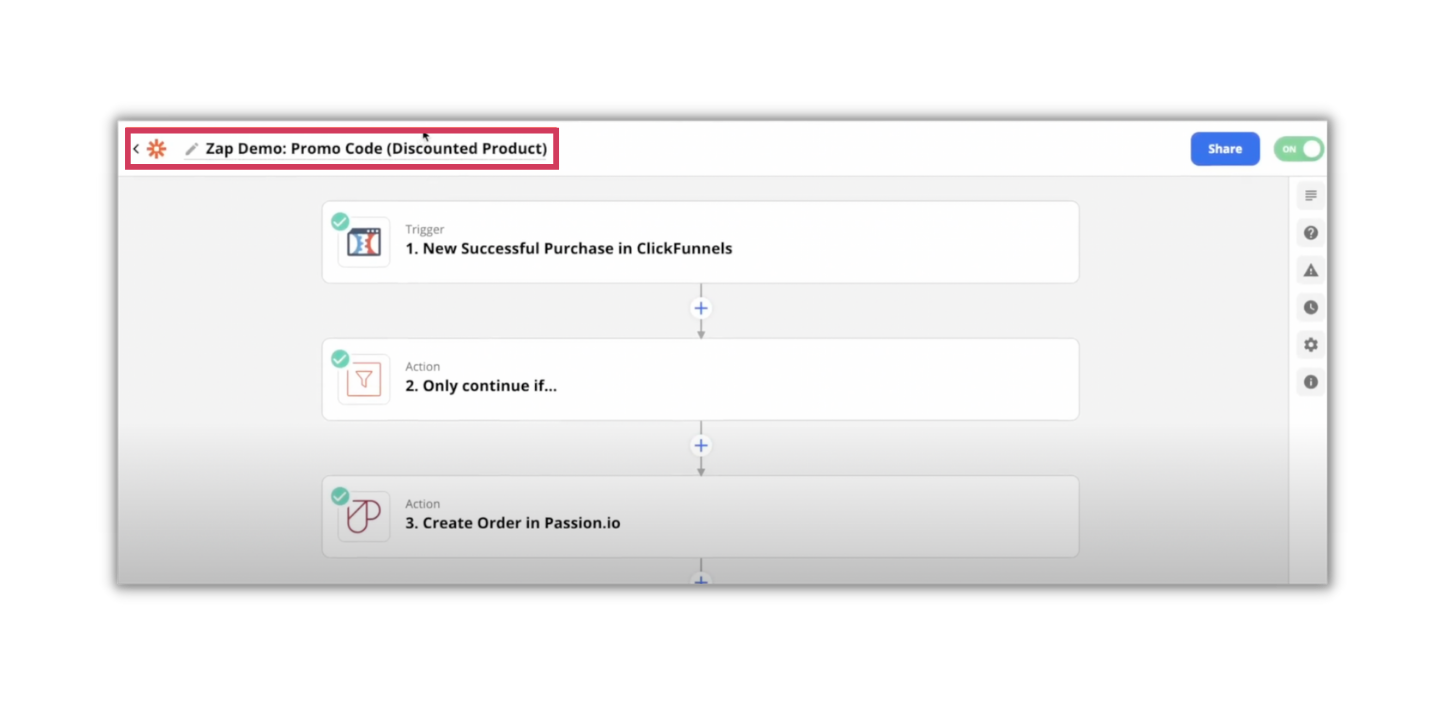
- Zap for Discounted Product:
- Zap for Full Price Product:
- In our example, we’ll be using ClickFunnels as the trigger:
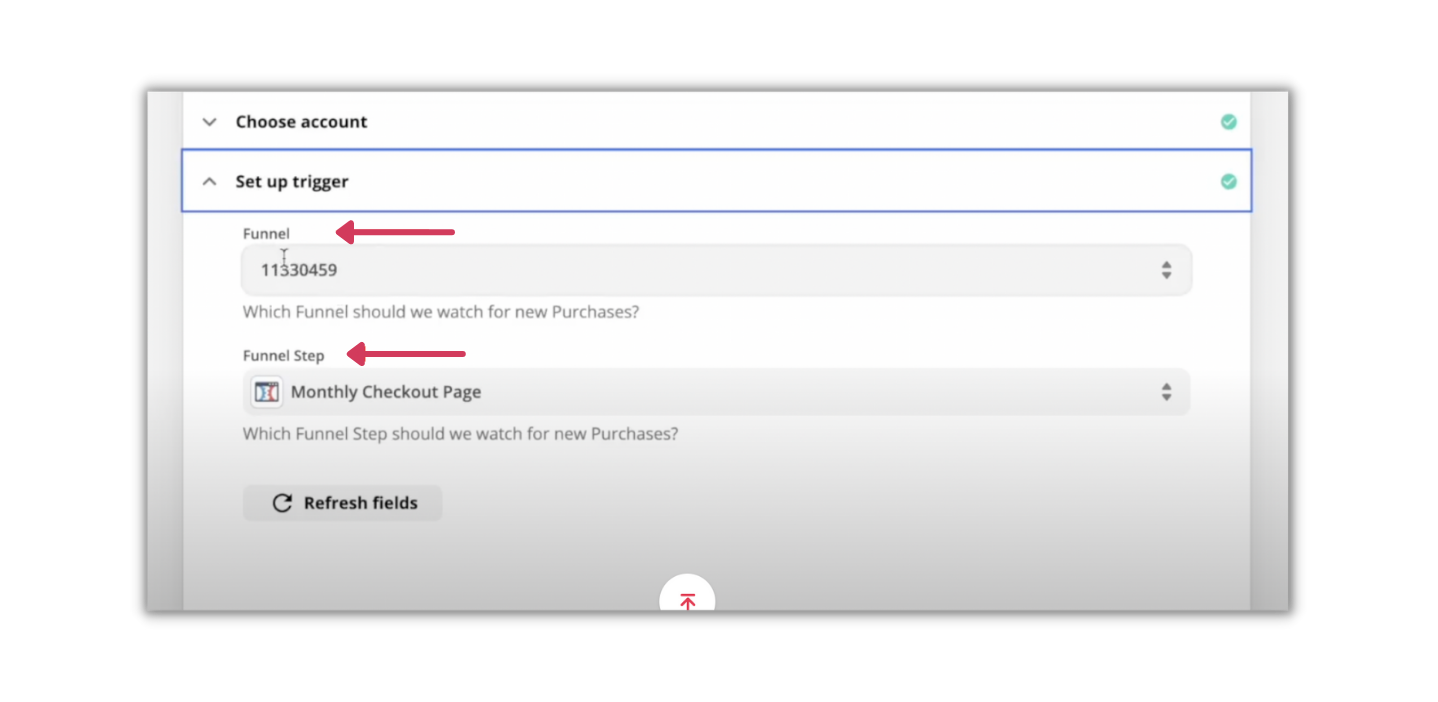
- Select the appropriate funnel ID and funnel step depending on your checkout page provider.
-
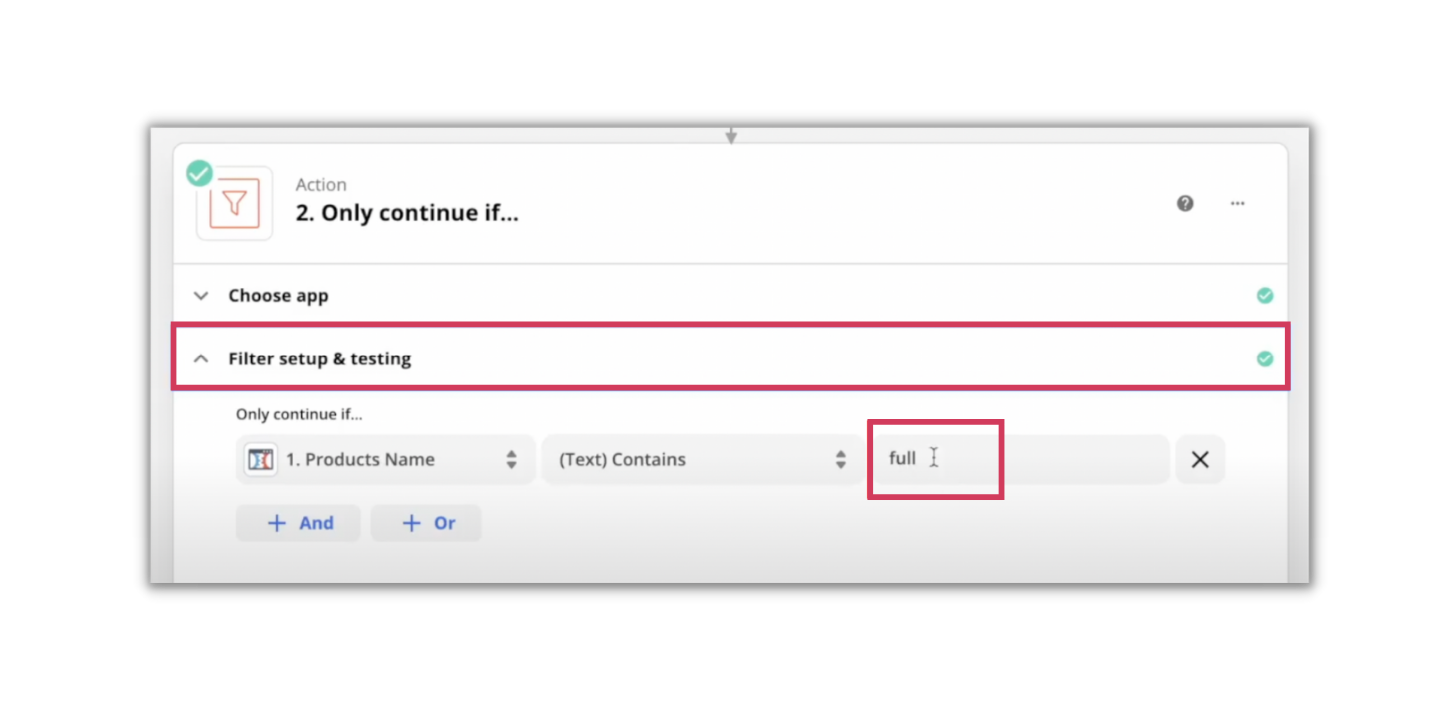
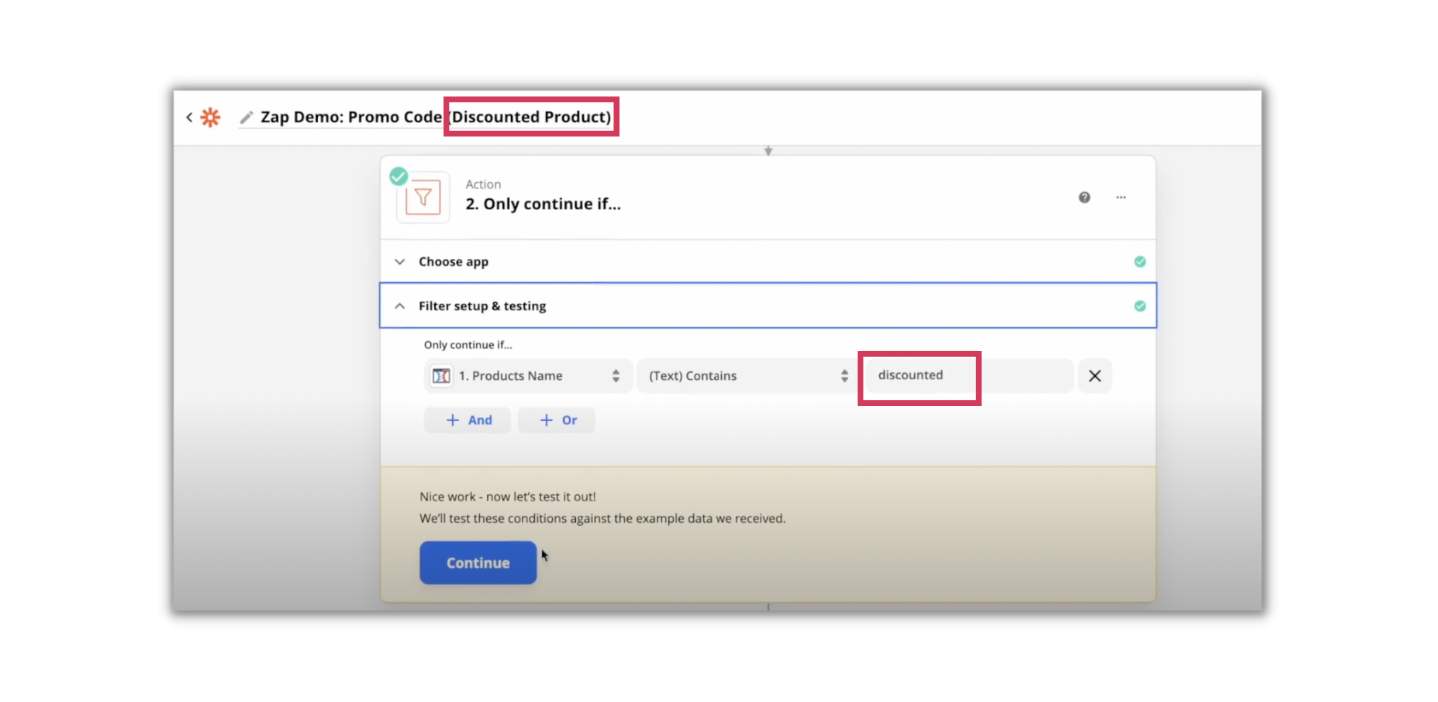
- Set up the filter and type in the word full so the zap will continue if the word is detected.
Filter is a Zapier tool that helps you run specific conditions, so this Zap won't continue unless the product name contains the word full.
Read more about Filter by Zapier
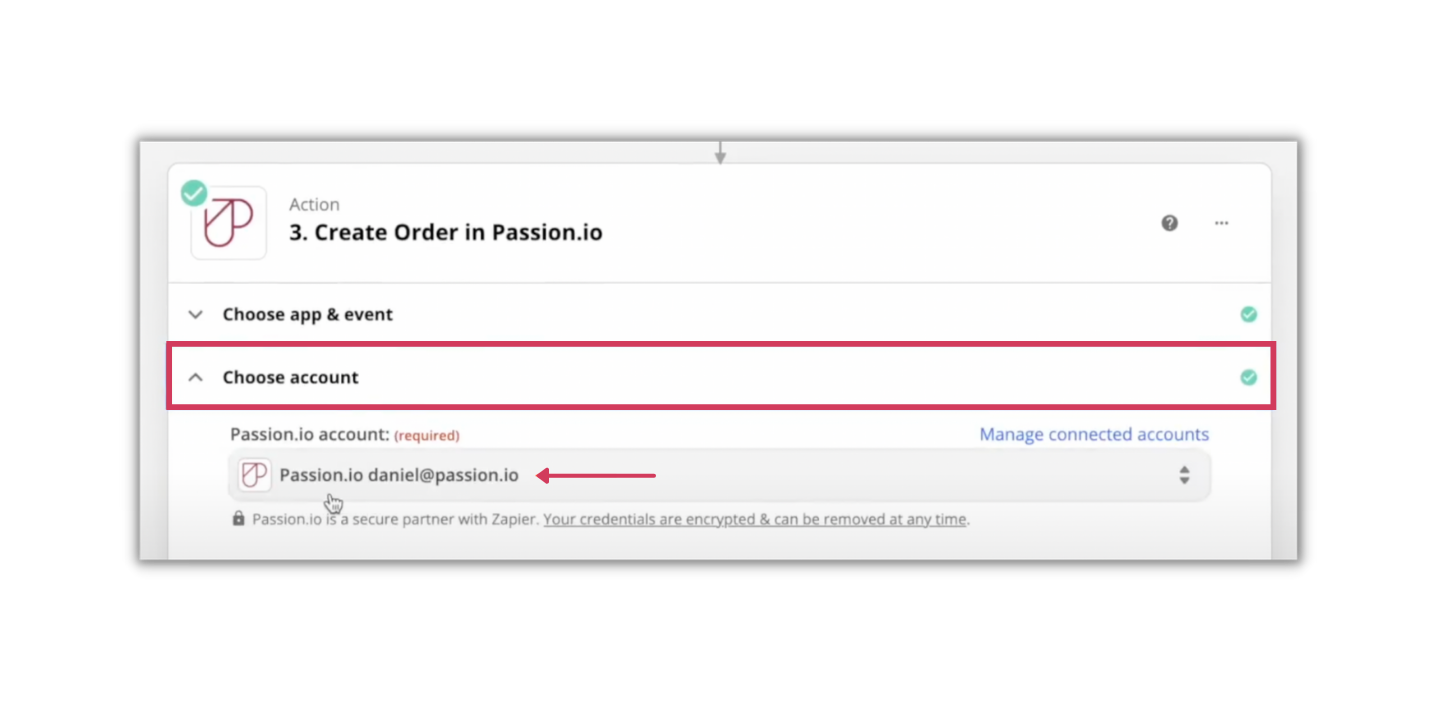
- Connect to Passion.io, choose your account, and type in your user email address and password
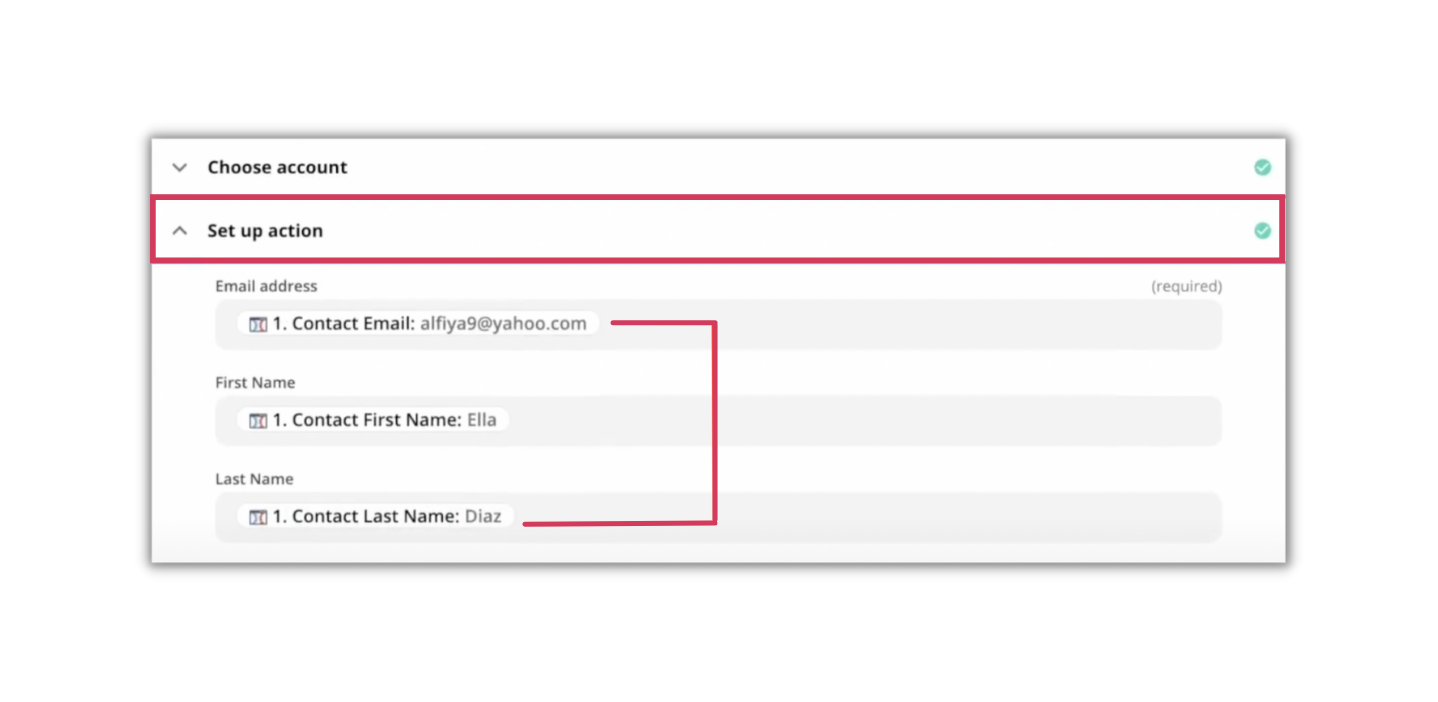
- Fill out the different fields: email address, first name, last name
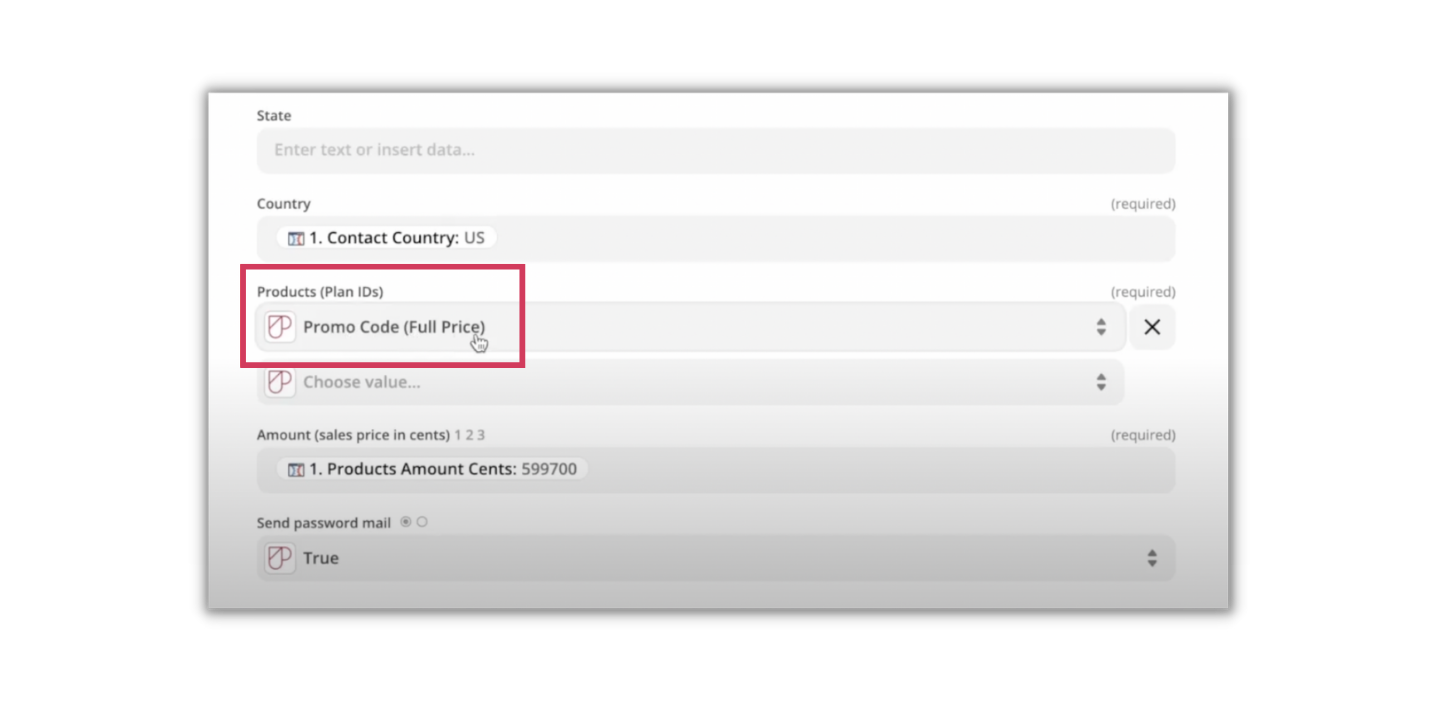
- Select the full-price plan from Passion.io and test the Zap.
- Do the same steps with the other zap (for the discounted) but change the filter and the product connected to discounted.
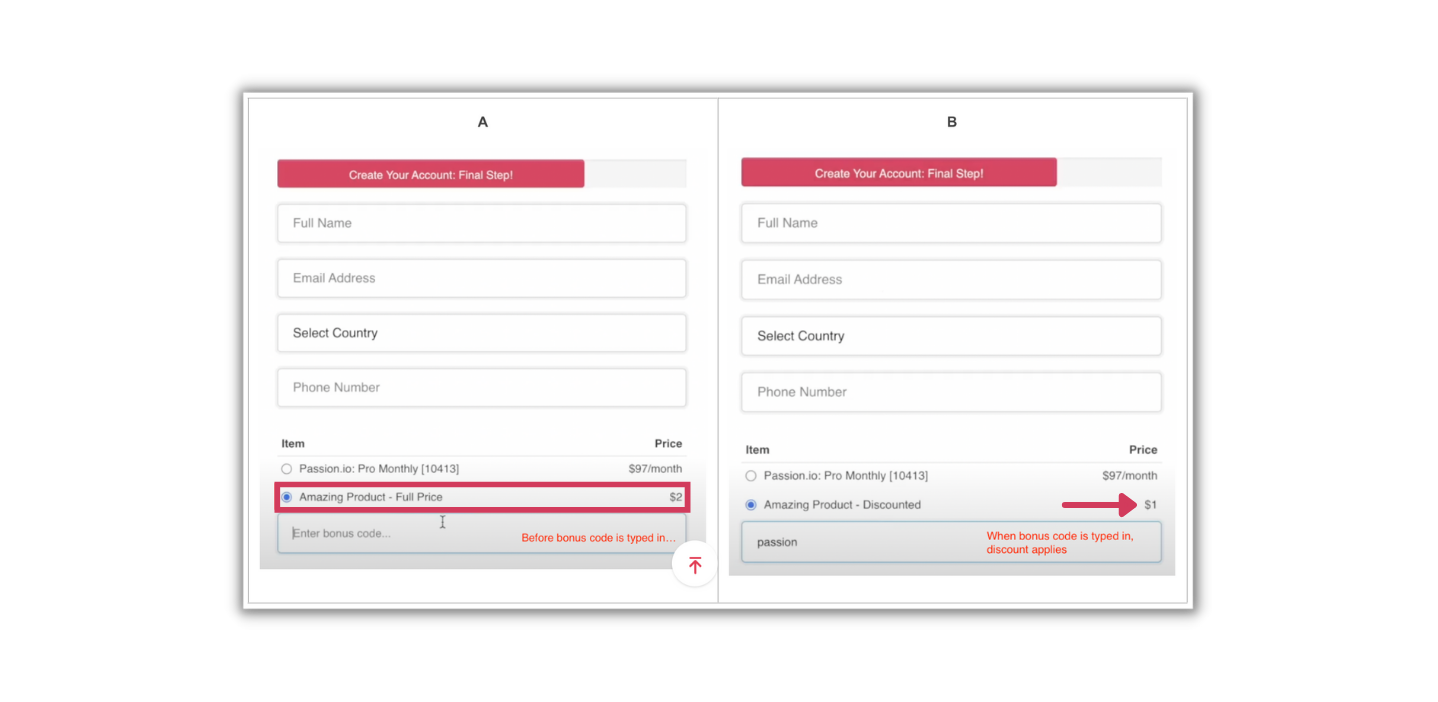
 When set up properly, the checkout page should work like Picture A and B
- Once the test purchase is done, check if the email address you used appeared on PassionMetrics. If it did, the Zapier integration was successful!